Dave59337
-
Posts
26 -
Joined
-
Last visited
-
Days Won
7
Dave59337's Achievements
")


-
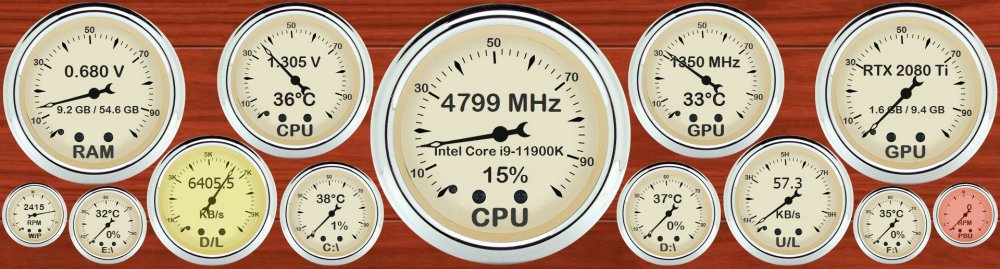
Liking the new panel abilities. 'Spzip' format now makes the file less than 1/2 the size, and with 'Custom (n States)' and 'Resize' in gauges it's just too easy. Panel size is 1101 x 3840 FC4.spzip
.thumb.png.ae6be5ce44f659d90329f06f007ef4a3.png)
-
Using iGPU for SensorPanel and AGPU for all else
Dave59337 replied to Dropcheck's topic in SensorPanel
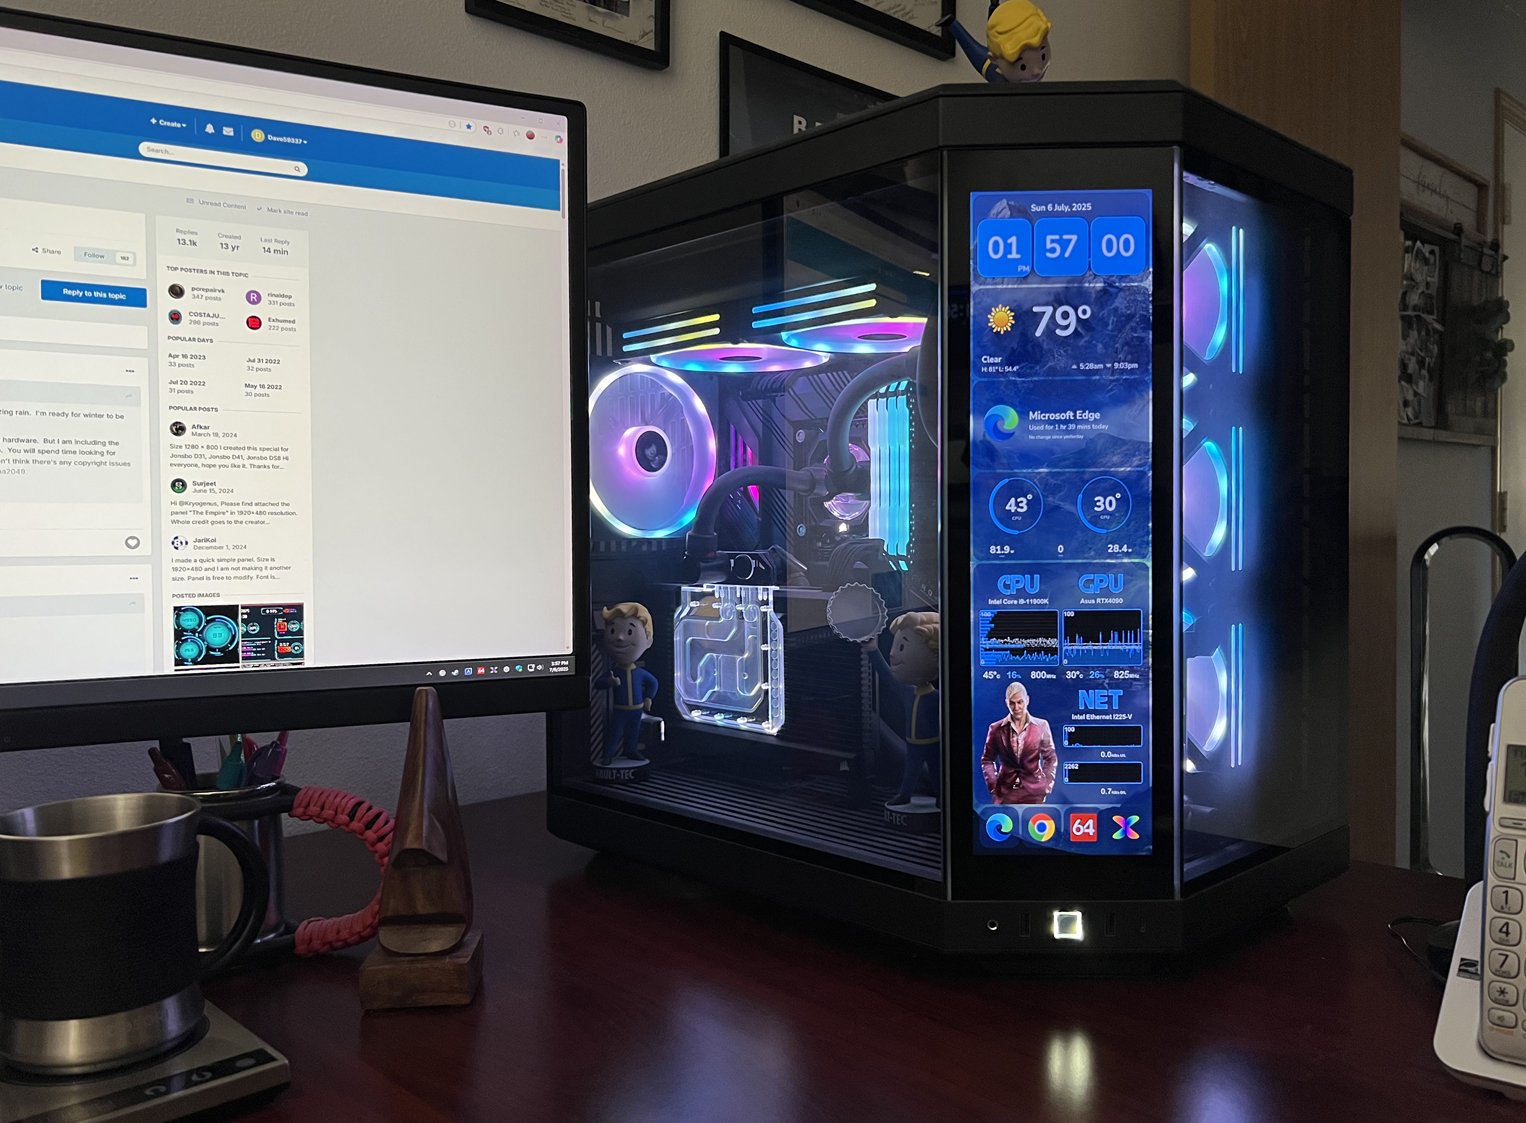
This might be late but, no. But I use the integrated GPU of my Intel i9-11900k to display my SensorPanel on the 1100x3840 Hyte Y70 screen. While at the same time using my 5120x1440 main monitor on my dedicated RTX4090 GPU. I'm also using Windows 11 and have no real problems. -
What SensorPanel resolution are you using? (poll)
Dave59337 replied to Mice007's topic in SensorPanel
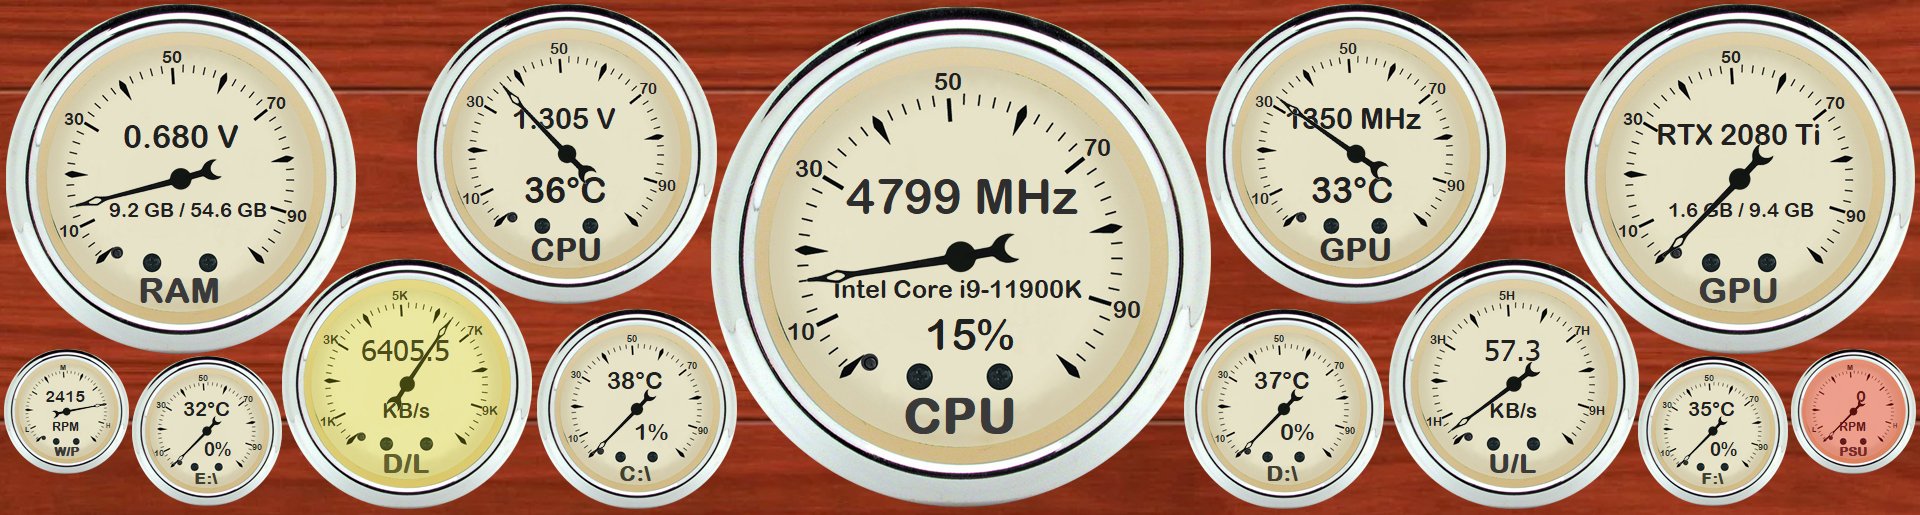
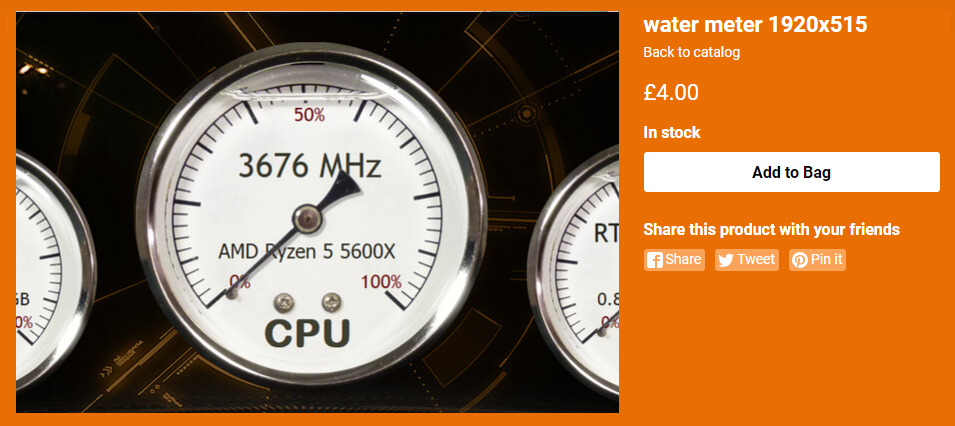
Have had several external monitors including 1920x515, 1152x648, 492x584 and 414x619. Now I went vertical on one machine, so the previous 1920x515 became 515x1920. And the other has a Hyte Y70 touch, so it is 1100x3840. -
Had the same problem. It appears all possible NIC's show up and change numbers (NIC1, NIC2, NIC3, etc.) I would pick the used one while creating a sensor panel. A day or week later it would flatline on the sensor graph. I would have to change the number being used each time. Since they all were just hanging around on the motherboard, and only one was being used I disabled the others. Since I use ethernet cables, I disabled the wireless in CMOS. One computer has two ethernet inputs, so I disabled the one not plugged in. I can't remember what I did, but I had to change some setting in Bluetooth as well. I finally ended up with NIC1 and no others showing up. Haven't had issues after.
-
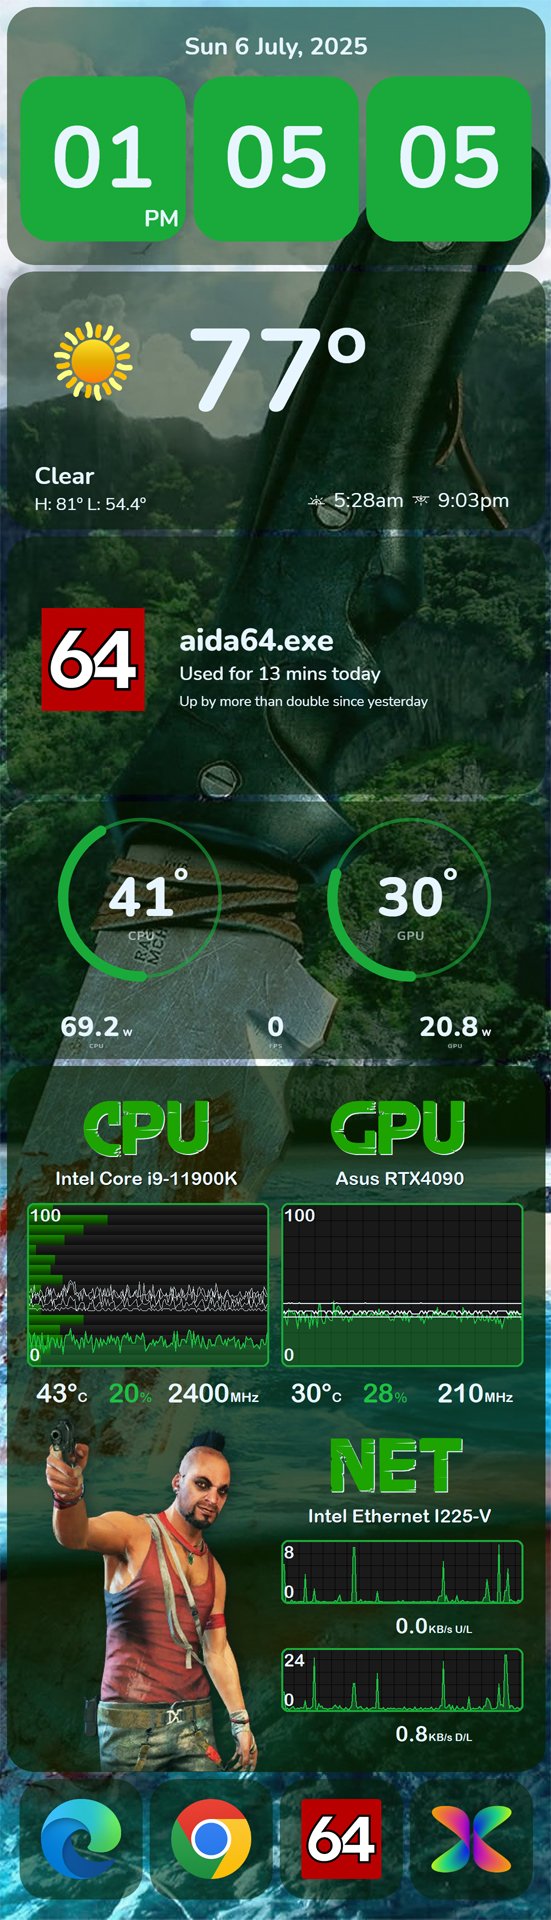
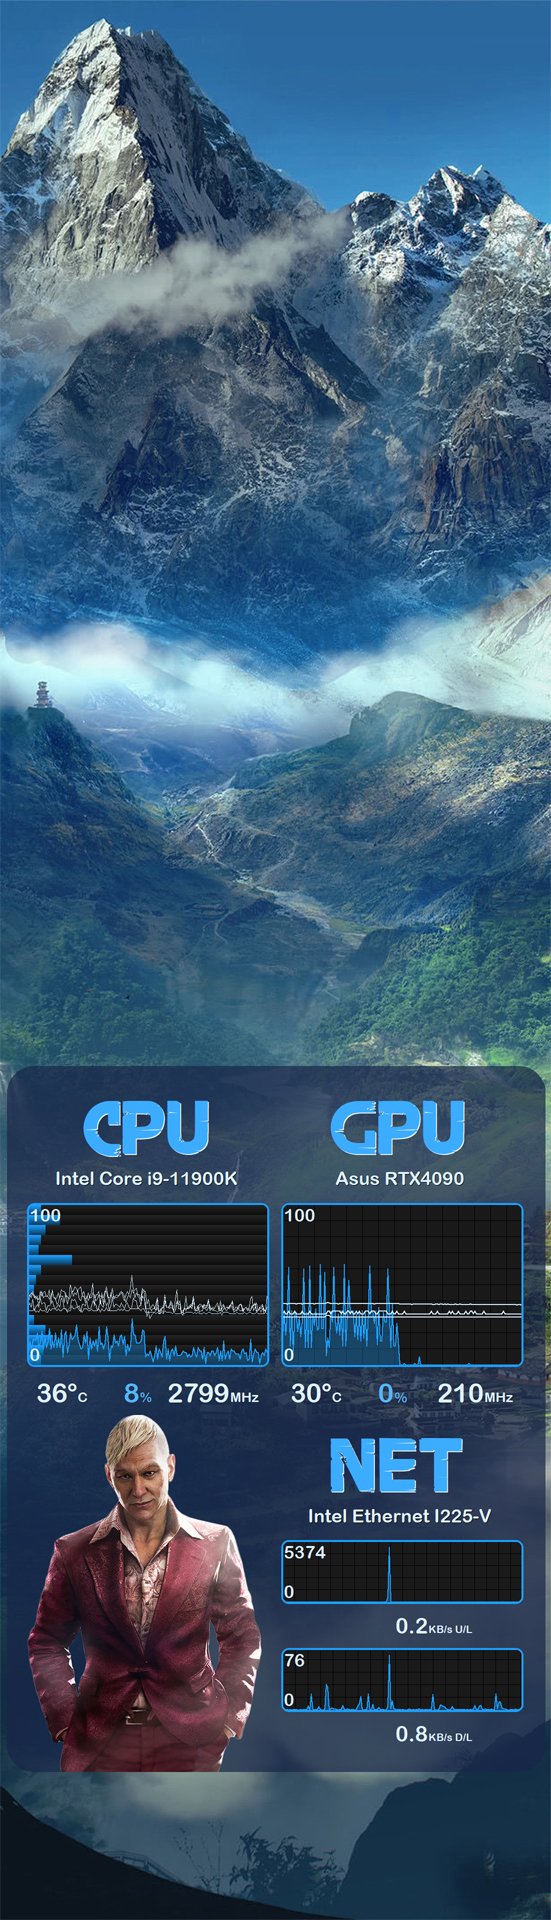
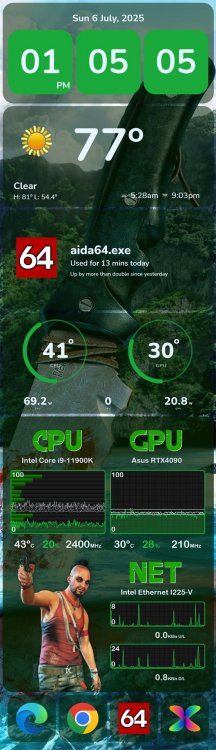
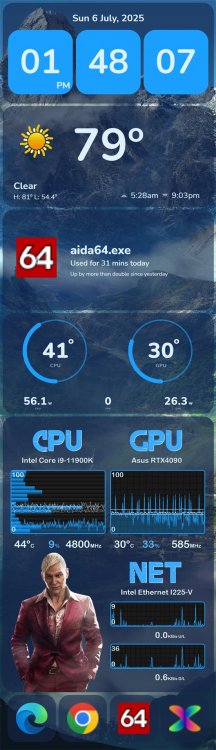
I've been away for a long time (years). (For reasons I won't go into) Nice to see my previous shares haven't totally gone away. Since then, I have picked up a Hyte70 touch. I have put Aida64 and Hyte Nexus together. I run Aida64 sensor panel on the background and the Hyte Nexus app on the foreground so the touch app will work. I have the Hyte Nexus app on top with a transparent background and 55ish percent on the widgets. The screen is supposed to run at 1100x3840 at 150% scale setting. The Nexus app won't run right if you change the scale. And you get a 1-pixel bleed to the desktop if you place the second image to the left of the main desktop. I found that making a custom resolution of 1101x3840 fixes the issue. I hope Hyte will clean up the app to not take so much CPU and GPU utilization. If you look at the graphs without Nexus running, I stopped Hyte Nexus from running halfway through the graph. You might notice Nexus takes up about 10% more CPU and 30% GPU time. I'm attaching: (1) my Aida64 FC4 panel, (2) the previous panel with Nexus over the top, (3) my Aida64 FC3 panel, (4) the previous panel with Nexus over the top, (5) a photo of my PC.


-
Try changing the screen resolution. Also try the "Advanced display" settings. Mine would flash once in a while at 60 Hz, and when I checked it wanted to run at 59 instead. Have you tried a different cable?
-
I did share it on the next post. I had to share it separately due to size.
-
I agree on your thoughts on Linux. However, I've been "playing" with computers since the 70's in high school. There was even a time I got paid for writing programs freelance. But that was still weekend play to me. If I "worked" with them as a career and/or needed my work for recognition or money, instead of a relaxing past-time, my opinions would probably be different. Here is the sensor panel. Feel free to use/change/whatever. I hope to see your final product here. When I said this, I wasn't thinking about the hands being in your previous images. You would have to put gauge and background gauge image over your background. I'm sure you can figure it out. Veglia.sensorpanel

-
I took your challenge and created three gauges...They are 0-15 images a piece. The gauges I make are images of hands that can be placed over backgrounds (gauge image.png's). I have included stripped images from your request with and without labels, so you can change them by adding text over them. (Between the image and gauge.) The gauges can be put on top of the image I included, or your own. Unless the gauges are of different size. I have a request before I would upload of the .sensorpanel file though. Lately I've been accused of stealing someone's designs. I need to ask where they came from, and hopefully I can verify there "free-ness." They have partial transparencies, so I doubt they are screen grabs from a game.
-
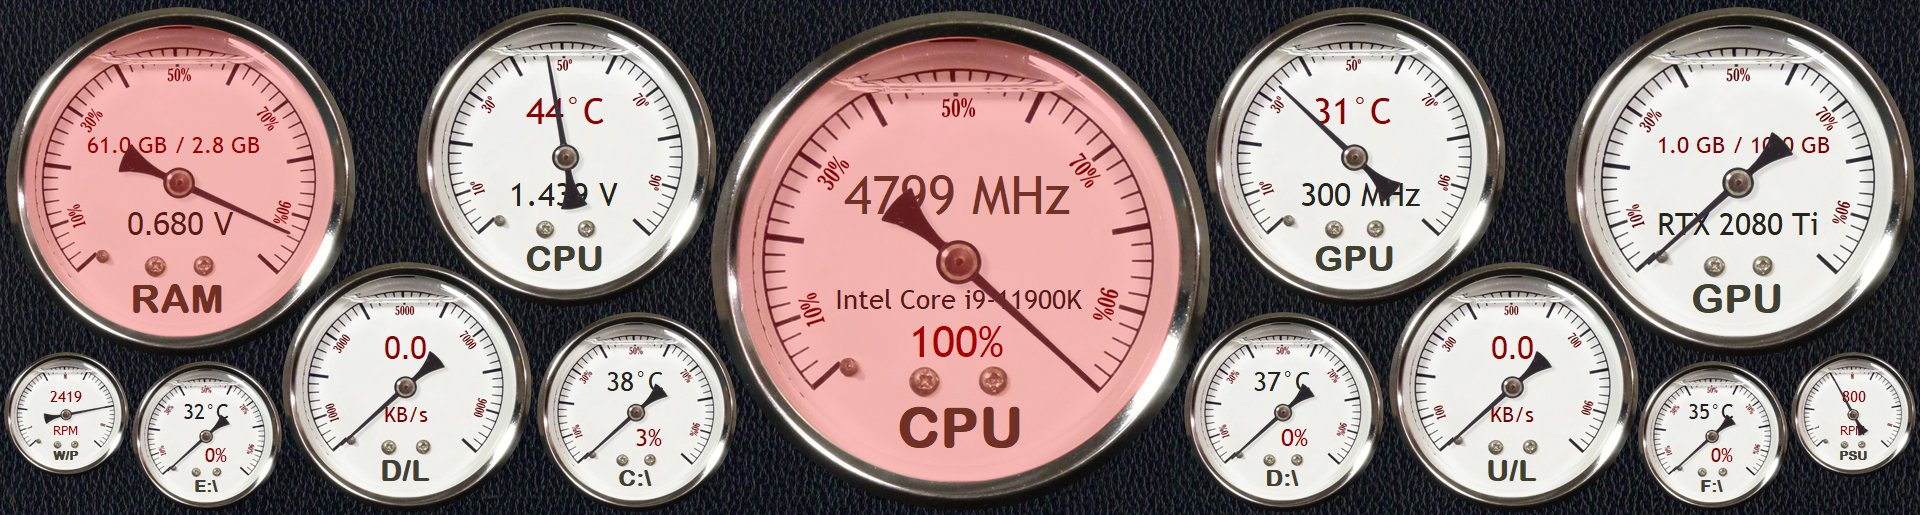
I redid the sensor panel once called "WaterMeterBig2." Changed the labeling style and a few graphical distortions. Now ALL gauges are 51-stage gauges. All hands always point to 0, 2, 4, 6, ..., 100 on the gauge. I also grabbed a .png off the internet of a car oil pressure gauge that I thought looked cool. I laid it out similar to the other one on a cherrywood background. It reminds me of the cool boat in the movie "On Golden Pond." Running them doesn't seem to slow my machine down at all. It uses about the same CPU time as the 16 stage gauges. But doing an export takes about 10 seconds with Aida64 showing the "not responding" warning on the sensor panel manager. As you can see, I also included the warnings for anything going at or near full speed as well as fans/pumps running too slow. On one I was running a memory stress test, and the other I turned off the power supply fan while viewing 3 security cameras at 64-time speed. And before anyone asks for me to share..., I can't. WG2.sensorpanel is 11.1 MB and BG2.sensorpanel is 10.1 MB. Each gauge takes 54 png's to build, each panel has 7 different sized gauges, plus the background...that's 379 pics to store. I only had 9.77 MB upload space allowable before I dropped these two jpg's down. Does anyone know if that ever increases or resets? I had to delete my 101-stage upload to add anything.

-
You might give a try to making a set of gauge-hands to overlay the other. You might take a look at my post of making multiple gauges. It's the 7th post on page 186 back from last year. You probably wouldn't like the green LED's crawling up the left or right, but a secondary red thin line (sort of like a second hand) might look nice. It's hard to tell at this size but the red hand has a shadow and light direction at 135 degrees and a shorter length instead of 145 when I made the black hand.
-
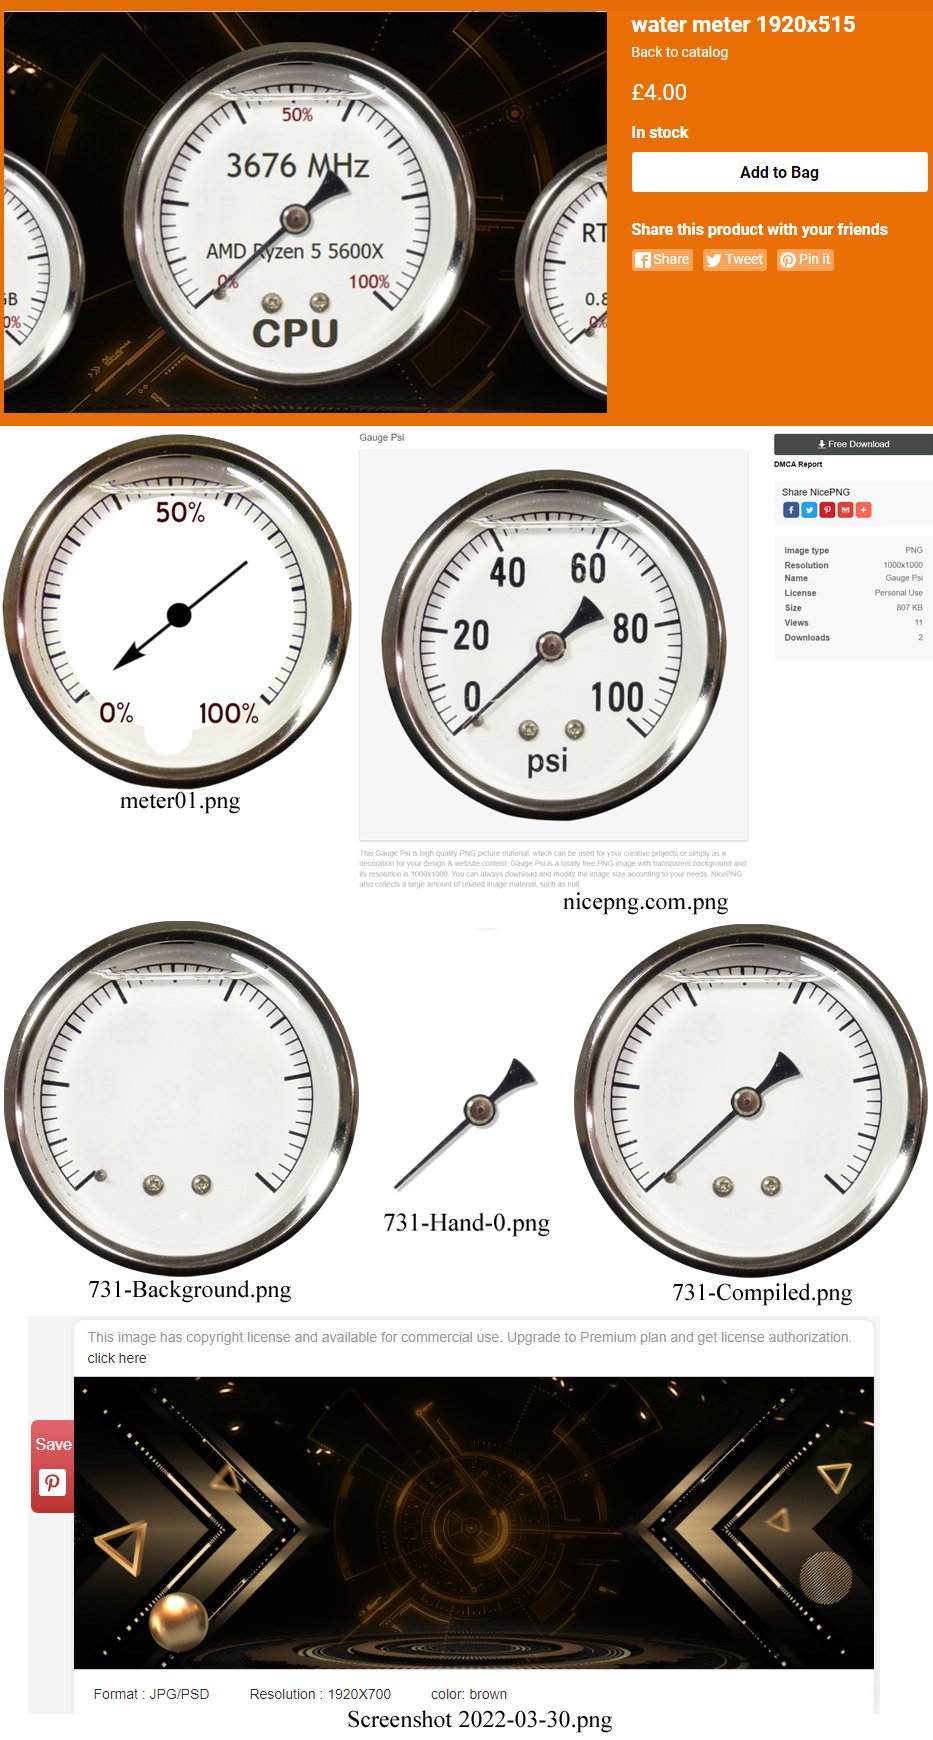
I previously stated: “So, I clicked on the invite to www.aida64skins.com from a previous message, and I see one of my sensor panels in stock and being sold there. Not too sure what to think about that.” I’ve thought about it. I should have said this: “So, I clicked on the invite to www.aida64skins.com from a previous message, and I see my gauges are in stock and being sold there. Not too sure what to think about that. With the hours I put on them, I could have at least got a request. I hope nobody lays claims to my 101 and 51 stage gauges I just added.” Yes, I downloaded pcrepairvk’s “meter 1024x600.sensorpanel” and “meter v1.sensorpanel” via link here. I liked his design but not his follow-through. His gauge images had crude hands placed at strange angles and white circles dropped on them to cover things he didn’t want. (See image meter01.png gotten from his .sensorpanel files.) So, I went to the internet to find a gauge to use to create from scratch gauges for a sensor panel. I saw an image of a gauge that looked like his. I decided to give homage to pcrepairvk’s design. I right clicked, saved and cropped the image from a google search showing the gauge offered for free at https://www.nicepng.com/ourpic/u2w7e6y3e6w7w7e6_gauge-psi/. (See image nicepng.com.png.) His gauges are using 16 images with hands already on them. Mine are created with a background (see image 731-Background.png) and 16 transparent hand images (see image 731-Hand-0.png) placed on top to create the ones you see. (See image 731-Compiled.png.) All the 18 images for each gauge came from the nicepng.com image. (16 rotated hand images careful to not rotate the center nut so the lighting is correct with shadowing effect, and 2 background images; with and without screws.) I left out all the numbers and the “psi” for a wider possible usage (degrees and MHz, etc.). After creating all the 731x731 pixel images, I resized them to other sizes you get from my sensor panel uploads. To finish I did use his background, because I ran into this while searching for a similar background: (See Screenshot 2022-03-30.png.) If he holds the copyright on this, he owns rights to the background, and should have mentioned it before putting in on the Aida64 site, I think. After the two uploads I deleted all his images and haven’t used them since. In fact, I had to redownload them today for examples. I did not download and just move around his gauges/images, nor just change the gauge parameters and descriptions. All my uploaded sensor panels with custom gauges were created from scratch. And the newest 51 and 101 stage gauges were back-to-the-original downloads again. After moving rotating and cropping, the hands don’t line up with the new manipulated gauge background images. Just manipulating a sensor panel, via changes in the “SensorPanel Manager - AIDA64” isn’t worth the upload. (IMAO) Look at the images and you all can decide who the work came from. If it looks odd that I only have one attachment, it was because I only had 2 MB upload space, so I placed the images on one white background and saved as a jpg.

-
So, I clicked on the invite to www.aida64skins.com from a previous message, and I see one of my sensor panels in stock and being sold there. Not too sure what to think about that.
-
Apologies!!! It was Wonderwquid's Idea. Even though Eddie did get my attention.
-
Here is the sensor panel file that would fit. I had to reduce the panel to only have 3 gauges. The RAM, CPU and C drive gauge. At least you would get all the 262 images needed to recreate it. Just duplicate the RAM gauge and move it, for the GPU gauge, and do the same with the C drive gauge to do the rest. Be careful when changing the type of any gauge though. For example: the first of 10 gauges needed to make the RAM gauge needs to have a range of 0 to 15. When you click on any other choice it will instantly be changed to 0-100. Have fun. 388161074_WasteofTime5(1920x515)_sensorpanel.72a193e2cfa7066e1a45bcc0c8f26c11
.png.35c7f12521d708cac56f8e664263e862.png)