


Drumbic
-
Posts
22 -
Joined
-
Last visited
Content Type
Profiles
Forums
Events
Posts posted by Drumbic
-
-
1 hour ago, KamiKazeKerr said:
Hello boys and girls of the interweb how are you I am fine thank you so I'm wondering is there a build sensor panels for dummies???? I really appreciate an enjoy your guys designs it would be really nice if I knew how to make my own I'm old as dirt and if there's anything like that other than bugging you find folks which I'd rather not do somebody could point me in the right direction I would really appreciate it thank you OK
So here is my quick run down how I made mine without any extra extra using what Windows comes with (and Aida64 of course) and what others have offered here.
Find a picture/background you want to use one your panel. Use windows photo to resize it to the size you need for your panel.
Use Adia64 to build your panel. It is built by layers. Bottom most being your back ground with everything else atop it as the next layers.
Adia64 has some stock gauges/graphics etc you can use. But let say you see a set of gauges you want to use on your that someone has shared and already created. Download the file they shared, import that panel to adia64. The program will save all the images contained in that panel to your Adia folder (where you saved Aida on your PC) and can now use them on yours. You can also resize each gauge using the windows photo editor.
The layering in Aida is on an X/Y axis (updown/leftright). You use the Aida editor to move your items in to the position you want.
Aida will automatically use the sensor for what you wish to monitor by you selecting the item you want to monitor. You than need to assign EACH picture of the gauge to that monitor (This sounds worse then it is). In Aida when you pick the monitor sensor, you can select each picture of the gauge (that you saved and resided earlier). Remember it is layers, so when the temp or whatnot goes up, it looks for the next picture in the gauge file you selected to give the visual of a gauge scaling up (in reality it is the next picture layer showing).
I would say dive into it, give it a go. Once you start messing with it, it makes more sense. It looks REALLY hard on the surface. But these are simple to create. Now some of the more in depth ones you see from @Exhumed and others, they (am assuming) using more software such as photoshop or Coral draw and other editing programs with much more capabilities (but they also pay for these programs and am guessing they are graphic designers or something along that realm).
-
 3
3
-
 1
1
-
-
6 hours ago, Hexen525 said:
OK, I must be doing something wrong here. I set my sensor panel size to the ones listed on each of the skins...and then it makes it a much larger size making all of the info in the wrong spots. When I reset the windows size, it just cuts off most of the info.
Right click the Aida64.exe (wherever you have it saved on your PC) > Properties > Compatibility Tab > Change High DPI Settings > Check Override high DPI scaling behavior. Scaling performed by: Select system in the drop down > ok > Apply (might need a restart for your panel to load right.)
-
1
-
2
-
-
17 hours ago, mxrkis said:
Ummmm guys??
maybe I'm crazy but this has to be the worst way to share anything online in internet history.
This forum is windows95 caliber, cant decently host imaging to display peoples work, nor can it safely share files to get people started with decent templates.
I figured reddit would have better ideas as to where people go to share their stuff and sure enough there isn't even a subreddit for aida64 (#how)
... SO I MADE ONE.
Reddit still wont solve how to show and share quickly and safely so if anyone has ideas for that then we're all ears cuz this is a 250 page conversation long mess of broken links.
please feel free to head over there and start posting ideas on how we can get this a better forum as this one seems blatantly outdated and under appreciated by its host.
HELP!Naw.
-
FPS wont hook till you start a game. Also must have RTSS running in the background. Easy way is to install MSI Afterburner with the RTSS, and have it start with windows.
For the GPU stuff, what GPU and are you using the latest up to date Aida?
-
7 hours ago, desoter said:
In my OP I said Im running 6.30.550 as my key wont let me upgrade, which I find odd as I bought a lifetime key. But that is the newest version that will work with my key.
And in the OP I said that it worked fine for a week+ just today the GPU info just up and disappeared like a fart in the wind.
Your version maybe your issue.
Don't believe your key is what you think it is... If I understand the Aida keys correctly, you can use your key forever on the last version available for that key, but you don't get upgrades outside your key period. Doesn't Aida allow you to renew a key at a discount? -
4 hours ago, desoter said:
Thanks Drumbic, I just tried this again, same issue, anything related to GPU speeds or utilization is just gone. Temps, voltages, VRAM, all there and working......
Also like I said it worked fine for a weekish, just booted up today and gone....
Weird. I am looking through my settings to see if anything may have been different....
You have the latest version with good key?
-
I had this with my 3080. I tried everything. I ended up uninstalling Aida, restarting PC, reinstalling. Worked.
-
6 hours ago, Öld Ðad said:
So i have to uninstall aida64 then reinstall it?
For me and my 3080, when I couldn't see much of the GPU, it worked uninstalling and reinstalling Aida.
-
9 hours ago, chriscand said:
I am diggin the 1st one. Simple and to the point.
-
1
-
1
-
-
2 hours ago, Exhumed said:
All graphics cards have such sensors and can be queried in Aida64. You just have to choose the right sensor.
Aida64. "Simple sensor item" -> Category "System" scroll down until (after the sensors for drives) GPU sensor shows up. There you should see an hourglass as a symbol for the sensor. FPS if set correctly only shows a value when a game is actively running in a window. MSI aferbruner included the RTSS. Just run RTSS in the background.
I wouldn't even get the icon for the sensor in the menu... After a couple days of frustration with Aida and GPU/FPS stuff not showing, I completely uninstalled everything (Aida, RTSS etc), reinstalled and BOOM GPU showed. I was getting nothing for the GPU other then temps, no utilization icon nothing.. Not sure if something was messed up during install or what, but reinstalling everything seemed to make it all jive.
I ended up running MSI Afterburner in place of RTSS alone; Plus having it on the drive where the game is hooking from seemed to fix it as well.
-
Try this
Go to where your Aida64 .exe is. Right Click > Properties > Compatibility Tab > 'Change High DPI settings' > Check 'Override High DPI Scaling' Scaling performed by: 'System' (from the drop down) > Ok/Apply > Restart.
-
3
-
5
-
-
Run MSI Afterburner (that has RTSS as part of it), I am having no issues with it running that way. I did have issues when I ran RTSS on its own.
-
1
-
-
On 5/3/2022 at 3:59 PM, Öld Ðad said:
Is anyone else having an issue with not being able to find the gpu temp on a 3090. Ive been using my sensor panel for abit now and have had no issues until i installed my new 3090. Everything else is working for the gpu such as the utilization and all of that but the temp doesnt and I cant find it in the program. I have a evga FTW3 rtx 3090 if that helps
I was having a similar issue with my 3080... Make sure you have the most up to date Aida64 release and then Uninstall and reinstall it. (Make sure you save your sensor panels before deleting). Once I reinstalled, EVERYTHING worked.
-
I was having something similar with my 3080. Anytime the screens went to sleep, or loading a full screen game, other monitors seemed to do their own thing. I would also get funky stuff when importing different (correct sized) sensor panels.
Goto where your Aida64 .exe is. Right Click > Properties > Compatibility Tab > 'Change High DPI settings' > Check 'Override High DPI Scaling' Scaling performed by: 'System' (from the drop down) > Ok/Apply > Restart.
Also, try putting your sensor panels etc, on the LEFT side of your main monitor in the windows display settings. I've read where they are can mess with what panels get what on wake up.
-
4 hours ago, MedaPayne said:
Hello everyone
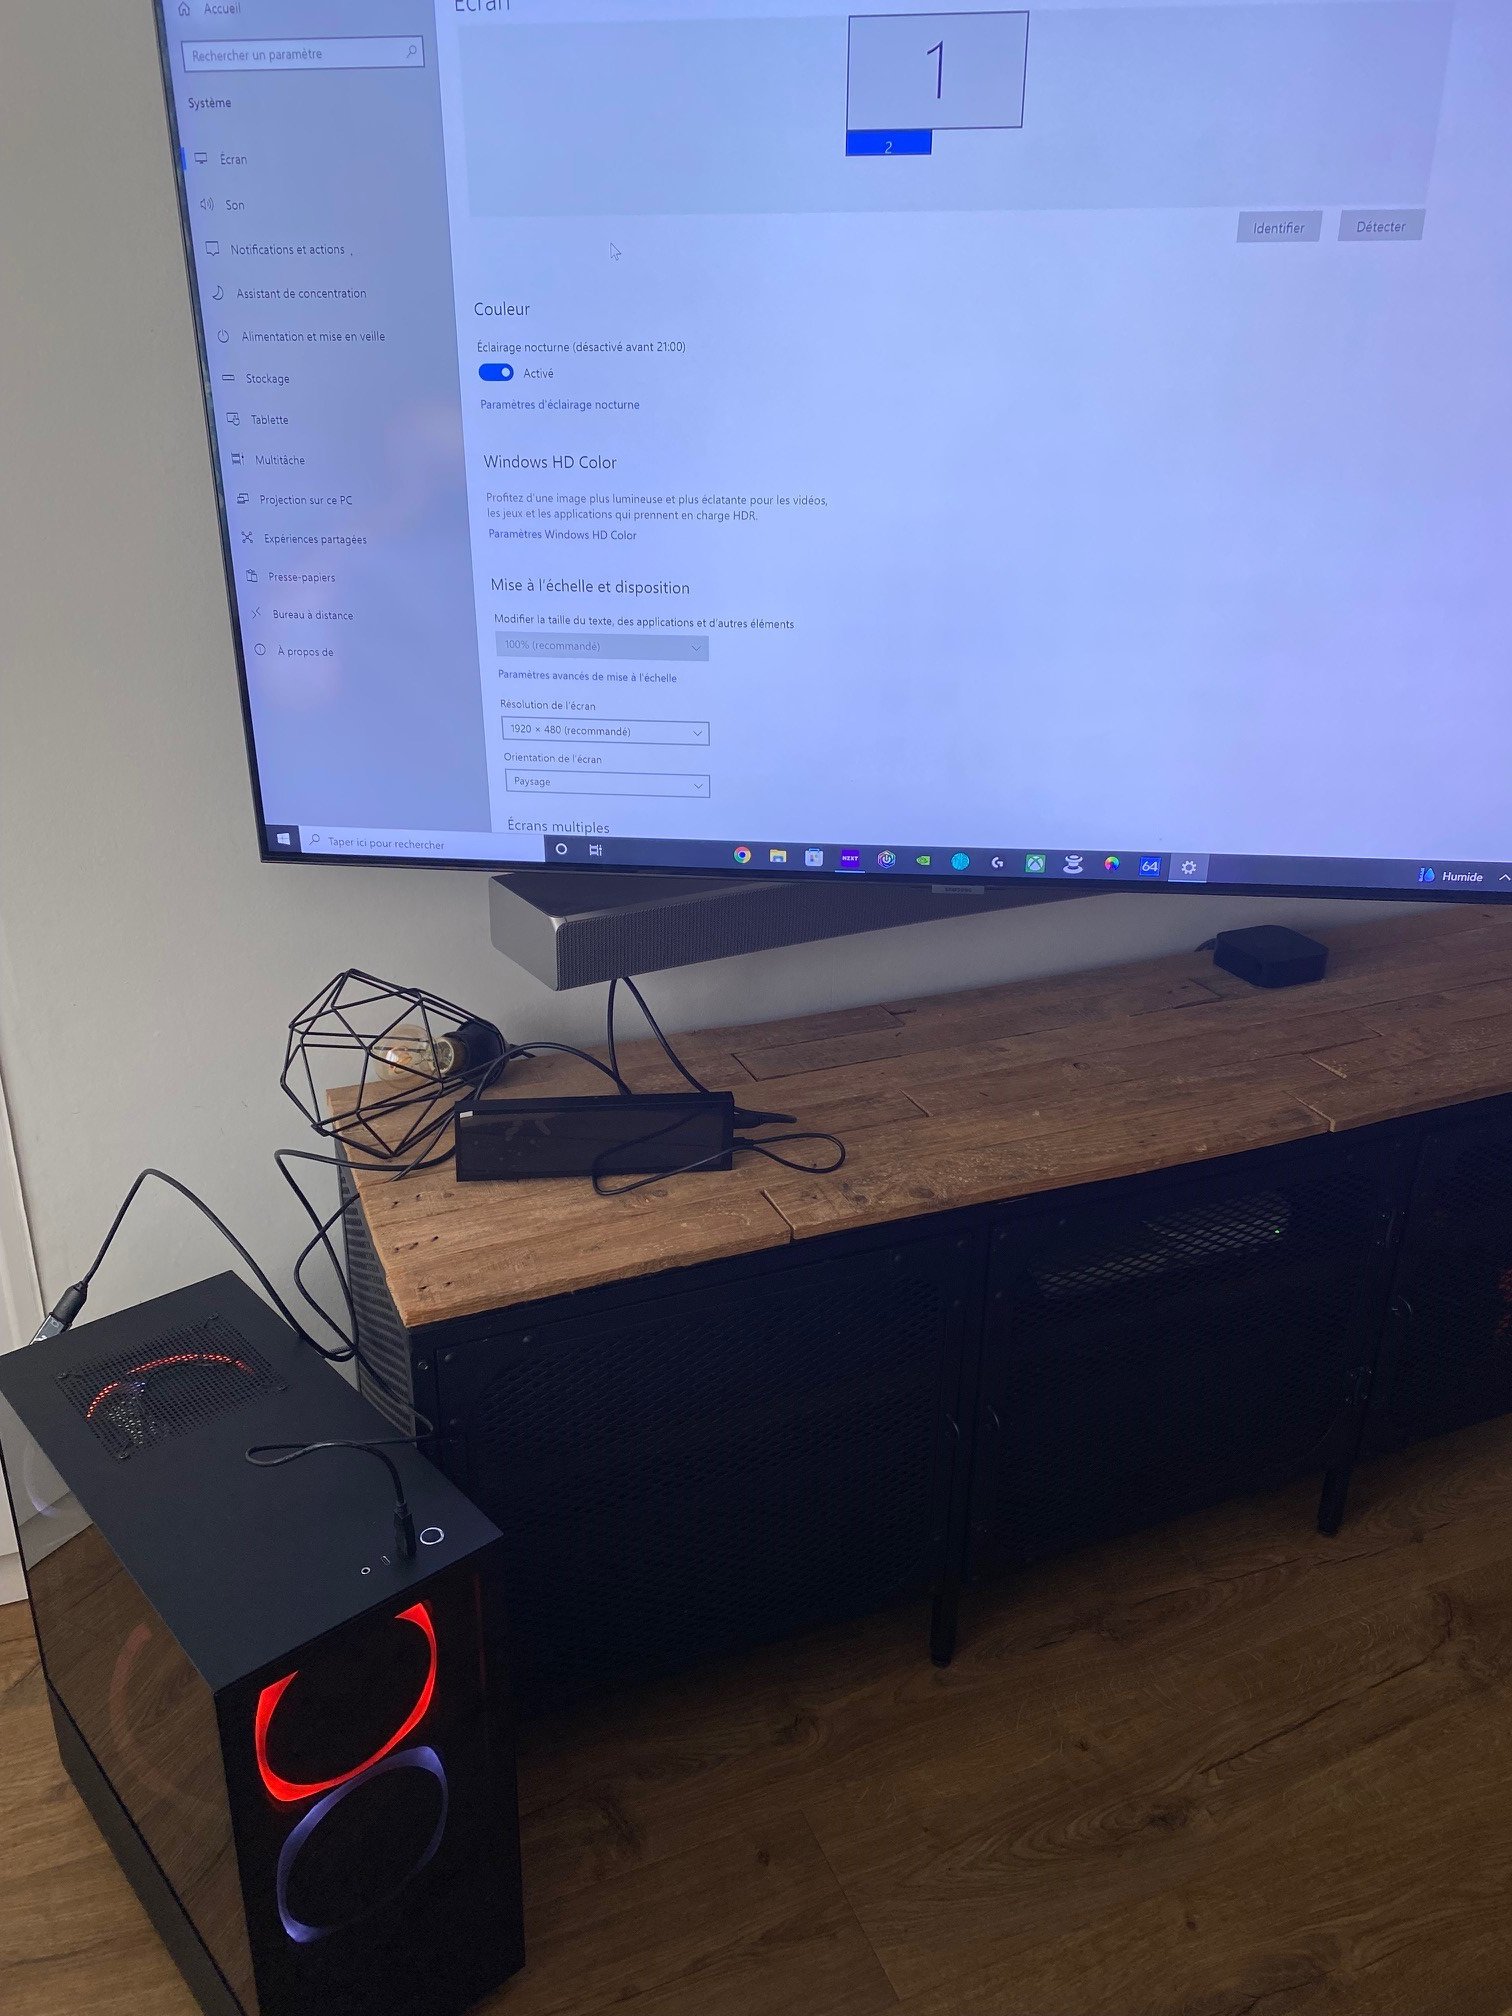
I need help with my 8.8 1920x480 screen
This one does not display on my Windows even though it is well recognized in the properties screens.

What is weird is that when turning on my PC the loading screen appears fine but as soon as I arrive on my windows session the display switches to my other screen and then nothing
I have an RTX 3070 graphics card and updated Windows 10 drivers.
I don't understand anything... if someone could help me that would be cool.
Thanks in advanceDo you have your setting in windows to 'extend these displays' under the multiple displays drop down under where you select your resolution on the main monitor?
-
Got frustrated uninstalled everything, reinstalled it all.
SOMETHING had to not get loaded right, but on the reload, everything is working.
Admin can close this out.
-
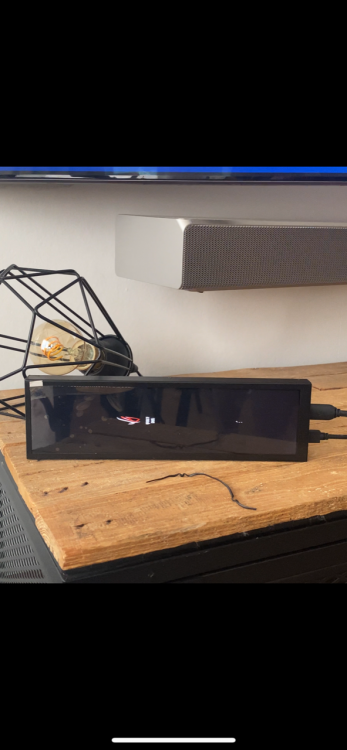
Take two. I like this one much better for my 5inch screen. 1200*720
-
4
-
-
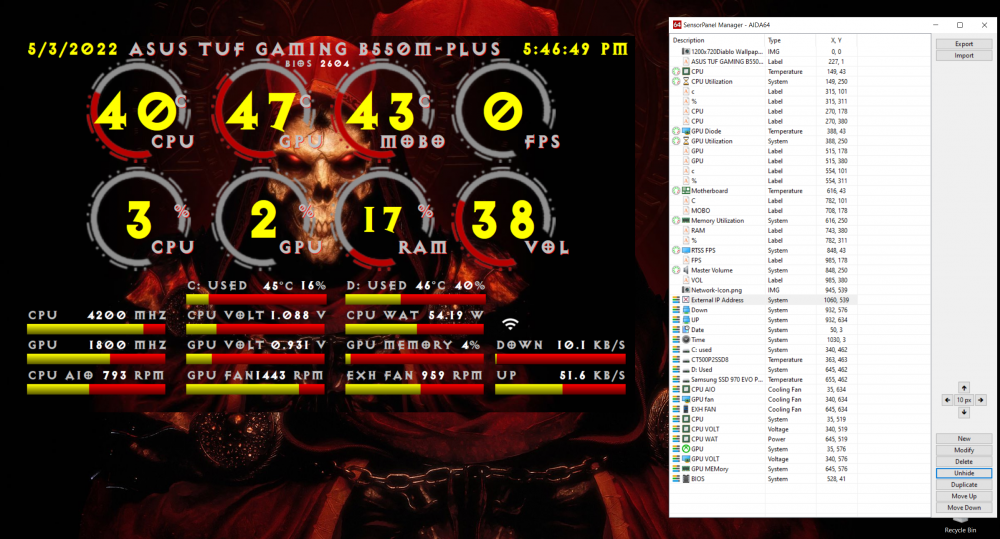
Hello. I've joined the sensor panel master race LOL. Here is my first go at it. 1200x700 Diablo themed.
I am having issues getting GPU Utilization, GPU clock and FPS to work. For the GPU, there is nothing showing a sensor for these two items. However, I know they are there as other software reports it. I have the FPS pointed at RTSS running in the back ground. SO I am lost on that last few parts to get it going 100%.
-
4
-
-
Update this morning.
Ensured the prior sensor panel ui was completely uninstalled. Reinstalled Aida.
CPU Temp IS now reporting.
GPU Utilization still not showing. Seems I have no where to point the panel in the sensors list what to monitor. I have enabled wake GPU with Aida, started games to see if it wasnt reporting at low use - not it.
FPS seems to be my other area not reporting, even with RTSS installed and running..
EDIT: FPS IS now reporting to Aida. I guess having the RTSS on the game drive vs my main drive with Aida made a difference?
-
I am also missing GPU Utilization, I have no where in the sensors to point the graph to.
------[ Versions ]------
Program Version : AIDA64 Extreme v6.70.6000
BenchDLL Version: 4.5.859.8-x64
Windows Version : Microsoft Windows 10 Pro 10.0.19044.1682 (64-bit)
GetProductInfo : 0x00000030------[ Motherboard Info ]------
Motherboard ID : <DMI>
Motherboard Model : Asus TUF Gaming B550M-Plus (Wi-Fi)
Motherboard Chipset : AMD B550, AMD K19.2 FCH, AMD K19.2 IMCDMI MB Manufacturer : ASUSTeK COMPUTER INC.
DMI MB Product : TUF GAMING B550M-PLUS (WI-FI)
DMI MB Version : Rev X.0x
DMI MB Serial : 200772056301736
DMI SYS Manufacturer: ASUS
DMI SYS Product : System Product Name
DMI SYS Version : System Version
DMI SYS Serial : System Serial Number
DMI BIOS Version : 2604SMI Version = Error Code 00
Mobo Version = Error Code 00CPU Temperature = Error Code 00
CPU2 Temperature = Error Code 00
Mobo Temperature = Error Code 00
PSU Temperature = Error Code 00
CPU Fan = Error Code 00
System Fan = Error Code 00
nForce Fan = Error Code 00
Aux1 Fan = Error Code 00
Aux2 Fan = Error Code 00
Voltages = Error Code 00CPU Temperature = Error Code 00
CPU2 Temperature = Error Code 00
Mobo Temperature = Error Code 00
PSU Temperature = Error Code 00
CPU Fan = Error Code 00
System Fan = Error Code 00
nForce Fan = Error Code 00
Aux1 Fan = Error Code 00
Aux2 Fan = Error Code 00
Voltages = Error Code 00CPU Temperature = Error Code 00
CPU2 Temperature = Error Code 00
Mobo Temperature = Error Code 00
PSU Temperature = Error Code 00
CPU Fan = Error Code 00
System Fan = Error Code 00
nForce Fan = Error Code 00
Aux1 Fan = Error Code 00
Aux2 Fan = Error Code 00
Voltages = Error Code 00CPU Temperature = Error Code 00
CPU2 Temperature = Error Code 00
Mobo Temperature = Error Code 00
PSU Temperature = Error Code 00
CPU Fan = Error Code 00
System Fan = Error Code 00
nForce Fan = Error Code 00
Aux1 Fan = Error Code 00
Aux2 Fan = Error Code 00
Voltages = Error Code 00CPU Temperature = Error Code 00
CPU2 Temperature = Error Code 00
Mobo Temperature = Error Code 00
PSU Temperature = Error Code 00
CPU Fan = Error Code 00
System Fan = Error Code 00
nForce Fan = Error Code 00
Aux1 Fan = Error Code 00
Aux2 Fan = Error Code 00
Voltages = Error Code 00
-
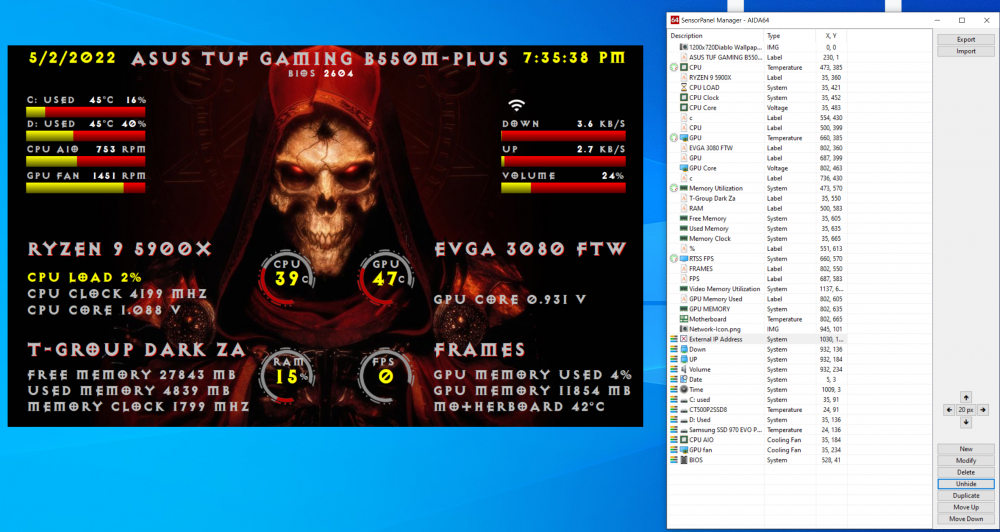
New to Aida64 and making my own panel. I have created my own panel layout as well as imported what other have made/posted, with the same issue. No CPU Temp reporting. Also getting no GPU utilization percent
Asus B550m-Plus (Wifi)
Ryzen 5900X
TeamGroup Dark Za 32gig RAM
EVGA 3080 FTW
Windows 10
I am 'assuming' since Aida isnt seeing a Motherboard ID from the board, this is the issue.... If so, is there a way to force Aida to see the mobo ID?
**EDIT TO ADD** I was running a generic 3.5 IPS I got from ebay and it picks up CPU temp etc without issue with temps consistent with with what HWMonitor reports.
Here is the debug:
------[ Versions ]------
Program Version : AIDA64 Extreme v6.70.6000
BenchDLL Version: 4.5.868.8-x64
Windows Version : Microsoft Windows 10 Pro 10.0.19044.1682 (64-bit)
GetProductInfo : 0x00000030------[ Motherboard Info ]------
Motherboard ID : <DMI>
Motherboard Model : Asus TUF Gaming B550M-Plus (Wi-Fi)
Motherboard Chipset : AMD B550, AMD K19.2 FCH, AMD K19.2 IMCDMI MB Manufacturer : ASUSTeK COMPUTER INC.
DMI MB Product : TUF GAMING B550M-PLUS (WI-FI)
DMI MB Version : Rev X.0x
DMI MB Serial : 200772056301736
DMI SYS Manufacturer: ASUS
DMI SYS Product : System Product Name
DMI SYS Version : System Version
DMI SYS Serial : System Serial Number
DMI BIOS Version : 2604ITE SuperIO Port = 00h
ITE SuperIO HWMonitor Port = 0000h ( 0000h / 0000h)
ITE SuperIO HWMonitor MMIO = 00000000h (00000000h / 00000000h)
ITE SuperIO Device ID = 0000h ( 0000h / 0000h)
ITE SuperIO Version = 00h ( 00h / 00h)Winbond SuperIO Port = 00h
Winbond SuperIO HWMonitor Port/60 = 0000h (0000h / 0000h)
Winbond SuperIO HWMonitor Port/64 = 0000h (0000h / 0000h)
Winbond SuperIO Device ID = 0000h (0000h / 0000h)Fintek SuperIO Port = 00h
Fintek SuperIO HWMonitor Port = 0000h (0000h / 0000h)
Fintek SuperIO Device ID = 0000h (0000h / 0000h)SMSC SuperIO Port = 00h
SMSC SuperIO HWMonitor Port = 0000h (0000h / 0000h)
SMSC SuperIO Device ID = 0000h (0000h / 0000h)ASpeed SuperIO Port = 00h
------[ K15.6/K15.7/K16.6/K17/K17.1/K17.2/K17.3/K17.5/K17.6/K17.7/K18/K19.2/K19.4/K19.5/K21 PM2 at 0CD0 ]------
0000 00 00 00 00 00 00 00 00 00 00 00 00 00 00 00 00
0010 00 00 00 00 00 00 00 00 00 00 00 00 00 00 00 00
0020 00 00 00 00 00 00 00 00 00 00 00 00 00 00 00 00
0030 00 00 00 00 00 00 00 00 00 00 00 00 00 00 00 00
0040 00 00 00 00 00 00 00 00 00 00 00 00 00 00 00 00
0050 00 00 00 00 00 00 00 00 00 00 00 00 00 00 00 00
0060 00 00 00 00 00 00 00 00 00 00 00 00 00 00 00 00
0070 00 00 00 00 00 00 00 00 00 00 00 00 00 00 00 00
0080 00 00 00 00 00 00 00 00 00 00 00 00 00 00 00 00
0090 00 00 00 00 00 00 00 00 00 00 00 00 00 00 00 00
00A0 00 00 00 00 00 00 00 00 00 00 00 00 00 00 00 00
00B0 00 00 00 00 00 00 00 00 00 00 00 00 00 00 00 00
00C0 00 00 00 00 00 00 00 00 00 00 00 00 00 00 00 00
00D0 00 00 00 00 00 00 00 00 00 00 00 00 00 00 00 00
00E0 00 00 00 00 00 00 00 00 00 00 00 00 00 00 00 00
00F0 00 00 00 00 00 00 00 00 00 00 00 00 00 00 00 00------[ K15.6/K15.7/K16.6/K17/K17.1/K17.2/K17.3/K17.5/K17.6/K17.7/K18/K19.2/K19.4/K19.5/K21 PM at 0CD6 ]------
0000 00 00 00 00 00 00 00 00 00 00 00 00 00 00 00 00
0010 00 00 00 00 00 00 00 00 00 00 00 00 00 00 00 00
0020 00 00 00 00 00 00 00 00 00 00 00 00 00 00 00 00
0030 00 00 00 00 00 00 00 00 00 00 00 00 00 00 00 00
0040 00 00 00 00 00 00 00 00 00 00 00 00 00 00 00 00
0050 00 00 00 00 00 00 00 00 00 00 00 00 00 00 00 00
0060 00 00 00 00 00 00 00 00 00 00 00 00 00 00 00 00
0070 00 00 00 00 00 00 00 00 00 00 00 00 00 00 00 00
0080 00 00 00 00 00 00 00 00 00 00 00 00 00 00 00 00
0090 00 00 00 00 00 00 00 00 00 00 00 00 00 00 00 00
00A0 00 00 00 00 00 00 00 00 00 00 00 00 00 00 00 00
00B0 00 00 00 00 00 00 00 00 00 00 00 00 00 00 00 00
00C0 00 00 00 00 00 00 00 00 00 00 00 00 00 00 00 00
00D0 00 00 00 00 00 00 00 00 00 00 00 00 00 00 00 00
00E0 00 00 00 00 00 00 00 00 00 00 00 00 00 00 00 00
00F0 00 00 00 00 00 00 00 00 00 00 00 00 00 00 00 00------[ ACPI Temperatures & Fans ]------
_TZ_.THM0._TMP :
_TZ_.THM1._TMP :
_TZ_.THR0._TMP :
_TZ_.THR1._TMP :
_TZ_.TZ00._TMP :
_TZ_.TZ01._TMP :
_TZ_.RTMP :
_TZ_.RFAN :
_TZ_.RFAN(0) :
_TZ_.RFAN(1) :
_SB_.ATKD._HID :
_SB_.ATKD.TMPR :
_SB_.PCI0.LPC0.EC0_.CCTV :
_SB_.PCI0.LPC0.EC0_.LRPM :
_SB_.PCI0.LPC0.EC0_.HRPM :
_SB_.PCI0.SBRG.EC0_.ECPU :
_SB_.PCI0.SBRG.EC0_.TACH(0):
_SB_.PCI0.SBRG.EC0_.TACH(1):
_SB_.PCI0.SBRG.EC0_.TAH0 :
_SB_.PCI0.SBRG.EC0_.TAH1 :
_SB_.PCI0.SBRG.EC0_.ST00 :
_SB_.PCI0.SBRG.EC0_.SC01 :
_SB_.PCI0.SBRG.EC0_.SC02 :
_SB_.PCI0.SBRG.EC0_.SC03 :
_SB_.PCI0.SBRG.EC0_.SC04 :
_SB_.PCI0.SBRG.EC0_.SC05 :
_SB_.PCI0.SBRG.EC0_.SC06 :
_SB_.PCI0.SBRG.EC0_.TH0R :
_SB_.PCI0.SBRG.EC0_.TH1R :
_SB_.PCI0.SBRG.EC0_.F0TS :
_SB_.PCI0.SBRG.EC0_.F1TS :
_SB_.PCI0.PIB_.EC0_.TCRT :
_SB_.PCI0.SBRG.EC0_.CTPM :
_SB_.PCI0.SBRG.EC__.CPUT :
_SB_.PCI0.SBRG.EC__.SYST :
_SB_.PCI0.LPC_.EC0_.CTMP :
_SB_.PCI0.LPCB.EC0_.CTMP :
_SB_.PCI0.LPC_.EC0_.TMP1 :
_SB_.PCI0.LPC_.EC0_.TMP2 :
_SB_.PCI0.LPC_.EC0_.TMPI :
_SB_.PCI0.LPC_.EC0_.TMPV :
_SB_.PCI0.LPCB.EC0_.A1TP :
_SB_.PCI0.LPCB.EC0_.A2TP :
_SB_.PCI0.LPCB.EC0_.FAN0 :
_SB_.PCI0.LPCB.EC__.TS1R :
_SB_.PCI0.LPCB.EC__.TS2R :
_SB_.PCI0.LPCB.EC__.TS3R :
_SB_.PCI0.LPCB.EC__.F1FL :
_SB_.PCI0.LPCB.EC__.F1FH :
_SB_.PCI0.LPCB.EC__.F2FL :
_SB_.PCI0.LPCB.EC__.F2FH :
_SB_.PCI0.LPC_.H8EC.RTMP :
_SB_.PCI0.LPC_.H8EC.LTMP :
_SB_.PCI0.LPC_.H8EC.MTMP :
_SB_.PCI0.LPC_.H8EC.GTMP :
_SB_.PCI0.LPCB.H8EC.CTMP :
_SB_.PCI0.LPCB.H8EC.DTMP :
_SB_.PCI0.LPCB.H8EC.GTMP :
_SB_.PCI0.LPCB.H8EC.ITMP :
_SB_.PCI0.LPCB.H8EC.MTMP :
_SB_.PCI0.LPCB.H8EC.STMP :
_SB_.PCI0.LPCB.H8EC.PFAN :
_SB_.PCI0.LPCB.EC0_.OTPC :
_SB_.PCI0.LPCB.EC0_.VGAT :
_SB_.PCI0.LPCB.EC0_.CHPT :
_SB_.PCI0.LPCB.EC0_.CPUT :
_SB_.PCI0.LPCB.EC0_.SYST :
_SB_.PCI0.LPCB.EC0_.DTS1 :
_SB_.PCI0.LPCB.EC0_.DTS2 :
_SB_.PCI0.LPCB.EC0_.DIMM :
_SB_.PCI0.LPCB.EC0_.FANH :
_SB_.PCI0.LPCB.EC0_.FANL :
_SB_.PCI0.LPCB.EC0_.CUTP :
_SB_.PCI0.LPCB.EC0_.PHTP :
_SB_.PCI0.LPCB.EC0_.DIMT :
_SB_.PCI0.LPCB.EC0_.INLE :
_SB_.PCI0.LPCB.EC0_.PANT :
_SB_.PCI0.LPCB.EC0_.F0RM :
_SB_.PCI0.LPCB.EC0_.F0DT :
_SB_.PCI0.LPCB.EC0_.F1RM :
_SB_.PCI0.LPCB.EC0_.F1DT :
_SB_.PCI0.SBRG.EC0_.CUTP :
_SB_.PCI0.SBRG.EC0_.PHTP :
_SB_.PCI0.SBRG.EC0_.DIMT :
_SB_.PCI0.SBRG.EC0_.INLE :
_SB_.PCI0.SBRG.EC0_.PANT :
_SB_.PCI0.SBRG.EC0_.F0RM :
_SB_.PCI0.SBRG.EC0_.F0DT :
_SB_.PCI0.SBRG.EC0_.F1RM :
_SB_.PCI0.SBRG.EC0_.F1DT :
_SB_.SAMB.TMPC :
_SB_.SAMB.TMPH :
_SB_.STR0._TMP :
_SB_.STR1._TMP :
_SB_.STR2._TMP :
_SB_.STR3._TMP :
_SB_.STR4._TMP :
_SB_.STR5._TMP :
_SB_.STR6._TMP :
_SB_.STR7._TMP :
CPUT :
GPUT :
SYST :
FANT :
BATT :


Cant download panels from the forums
in General Discussion
Posted
From the thread on them? A LOT are old and hosting is gone. There is still quite a few that people share. Also, making your own isnt too too bad to do yourself. Once you get the basics, it gets easier.