


xmanrigger
-
Posts
121 -
Joined
-
Last visited
-
Days Won
6
Content Type
Profiles
Forums
Events
Posts posted by xmanrigger
-
-
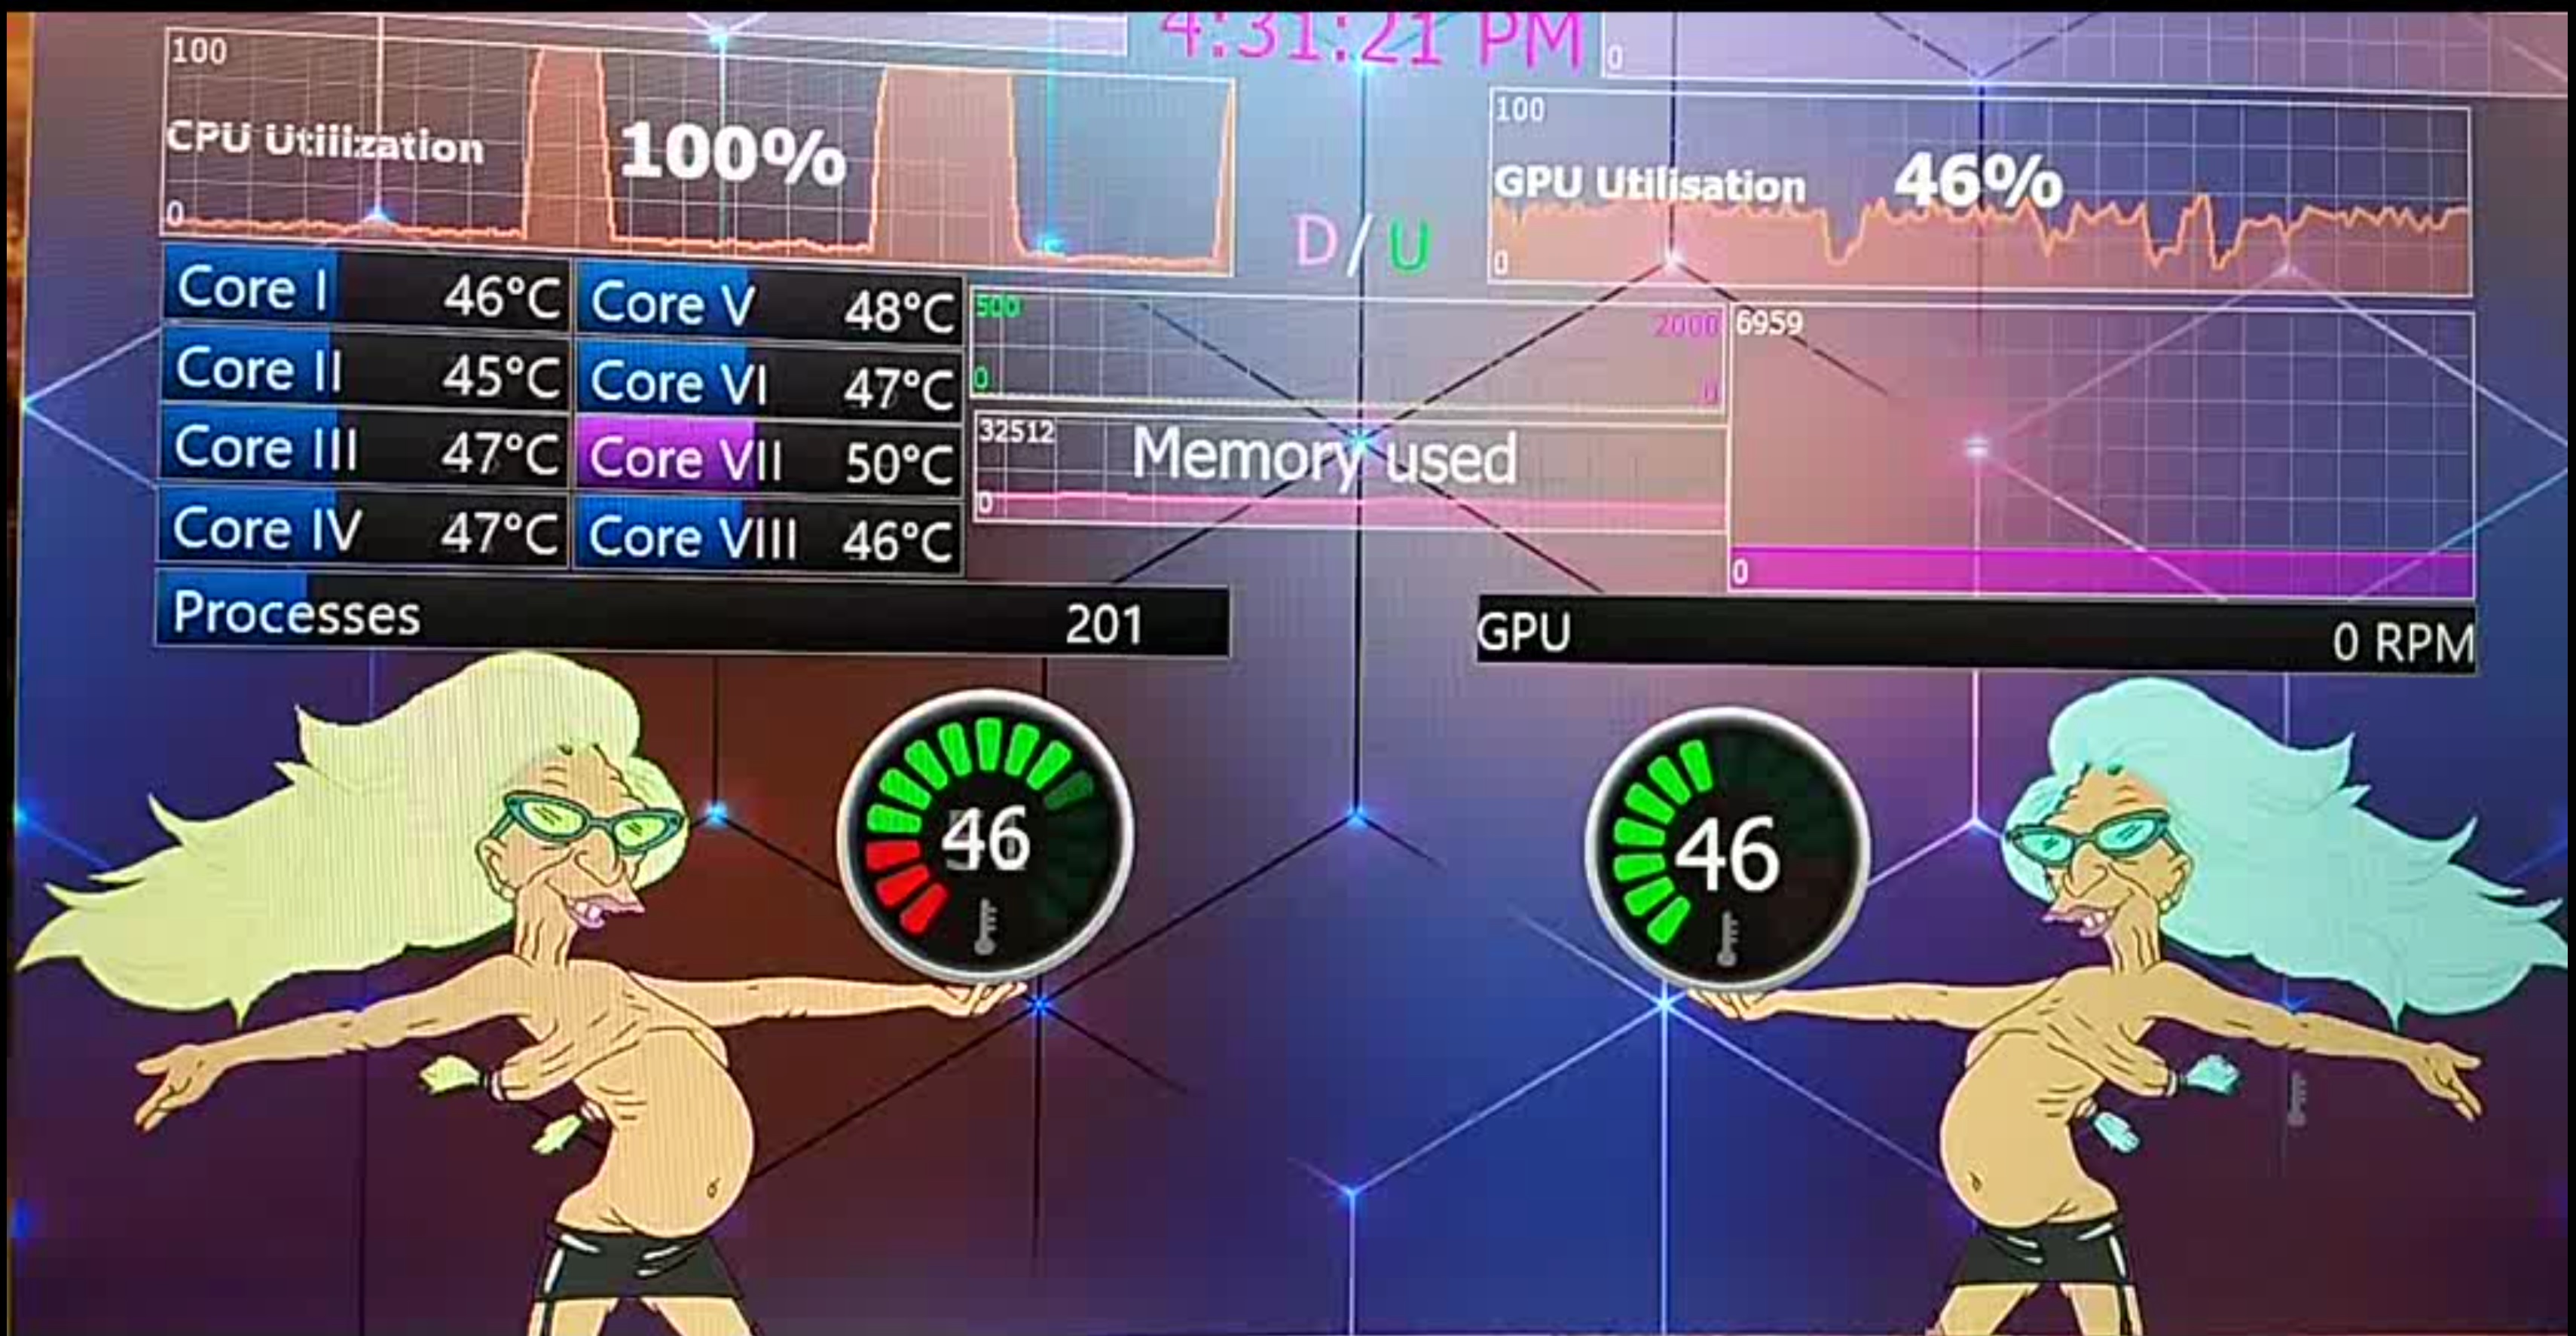
34 minutes ago, Killawhat said:
I have not been here for a while, but just been catching up. Is there a reason that, after 290 pages and years of hard work in this thread, that there all of a sudden is allowed lewd images to be used? Could these be marked as adult or something please @Mice007 or a moderator? I personally am shocked that these were allowed here and I will not be sharing this forum with anymore of my family or friends because of these. I don't want to start a discussion, just requesting because I LOVE seeing all the hard work from each one of you. I can remove this if a moderator requests. Thank you in advance.
Nothing 'lewd' about them. Yes, they maybe 'sexy'. No nudity. You see more skin on TV in CARTOONS. Sensor panel(s) was designated as ADULT. Dont download it if you dont like it.
Did this offend you? It was posted quite some time before. Nobody complained.

I suggest you stick to the Disney forums if this offends you.
-
 2
2
-
 1
1
-
 7
7
-
 1
1
-
-
7 hours ago, pcrepairvk said:
you covered my logo, and if I wrote to you, I am the author, believe me
Big deal. You shared it. What did you expect? Shared panels have been modified since the beginning of this thread. You yourself have modified others.
In your defence, kejsii should have given you original credit though.
I see no reason for the deletion of kejsii's shared panel.
Take your shit somewhere else and flog it. This thread is for sharing.
-
6
-
2
-
-
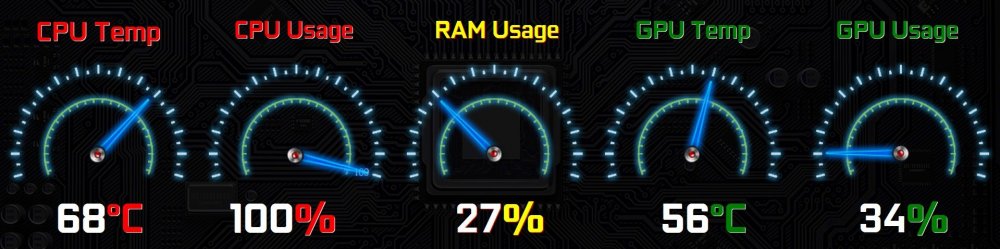
8 hours ago, ArcticKiwii said:
Recently received my first sensor panel screen, and here's what I ended up coming up with as a first attempt. Pretty simple compared to the awesome stuff you guys create, but I'm no less happy with my end product.
Must've went through 4 or 5 iterations of the gauge and temp scale before getting it right (Illustrator noob). They become more red/dark pink as utilization and temps get higher. I'll include a picture of a full gauge so you can see.
(P.S.: Font is Bebas Neue and credit to Smashicons on Flaticon for the icons)

500655149_SensorPanelAlpha1.0.sensorpanel 4.13 MB · 9 downloads
Cool gauges. Nice work and thanks for sharing.
-
1
-
1
-
-
5 hours ago, Jonathan Ho said:
Hi guys,
First time around trying this out. Here's a altered version of one I picked from this forum.
It's made 1280 x 720
Using Corsair Commander and has only detected 6 fans of 11.
Haven't found Water bump RPM as yet (connected to Asus x299 Prime Deluxe Motherboard), therefore no monitoring on fans and cooling as yet.

If the cooler is an AIO, Pump RPM should be indicated by whatever FAN Header you have it plugged into. Make sure Monitoring is enabled in BIOS for that Header. Visually look to see which one.
If your pump is powered directly from the PSU, a Molex or SATA power cable likely used. There is usually a PWM wire to connect to a Fan Header for monitoring.
-
On 7/10/2022 at 2:35 PM, ricem said:
my first gauge do it myself..it's a good start
You bet it is a good start! Thats a great start. This shit can get addictive.
Way better than one I DIDNT make. Please share when finished.
-
2
-
-
On 6/26/2022 at 7:09 AM, Ryu said:
I delete all panels because there is a person who feels uncomfortable with one revised version out of a total of 20 panels.
This is complete bullshit. Ryu, please continue posting your work. Dont worry what others have to say. The people that are 'uncomfortable' with your work are likely jealous of your skills and the fact you are not begging for money.
To those charging a fee for their panels; it is time to make a sub-forum and flog your stuff there. This forum thread is for SHARING. NOT ADVERTISING. This has been said time after time.
90% of the panels posted here are mods of originals posted. If you dont want your shit copied or modified, dont post it here.
So sad that the premise of this thread has been lost.
-
7
-
-
8 hours ago, Ryu said:
Thank you for your understanding.
Ryu!
Dont be discouraged. Your work is great and appreciated. You submissions are original and refreshing.
-
1
-
-
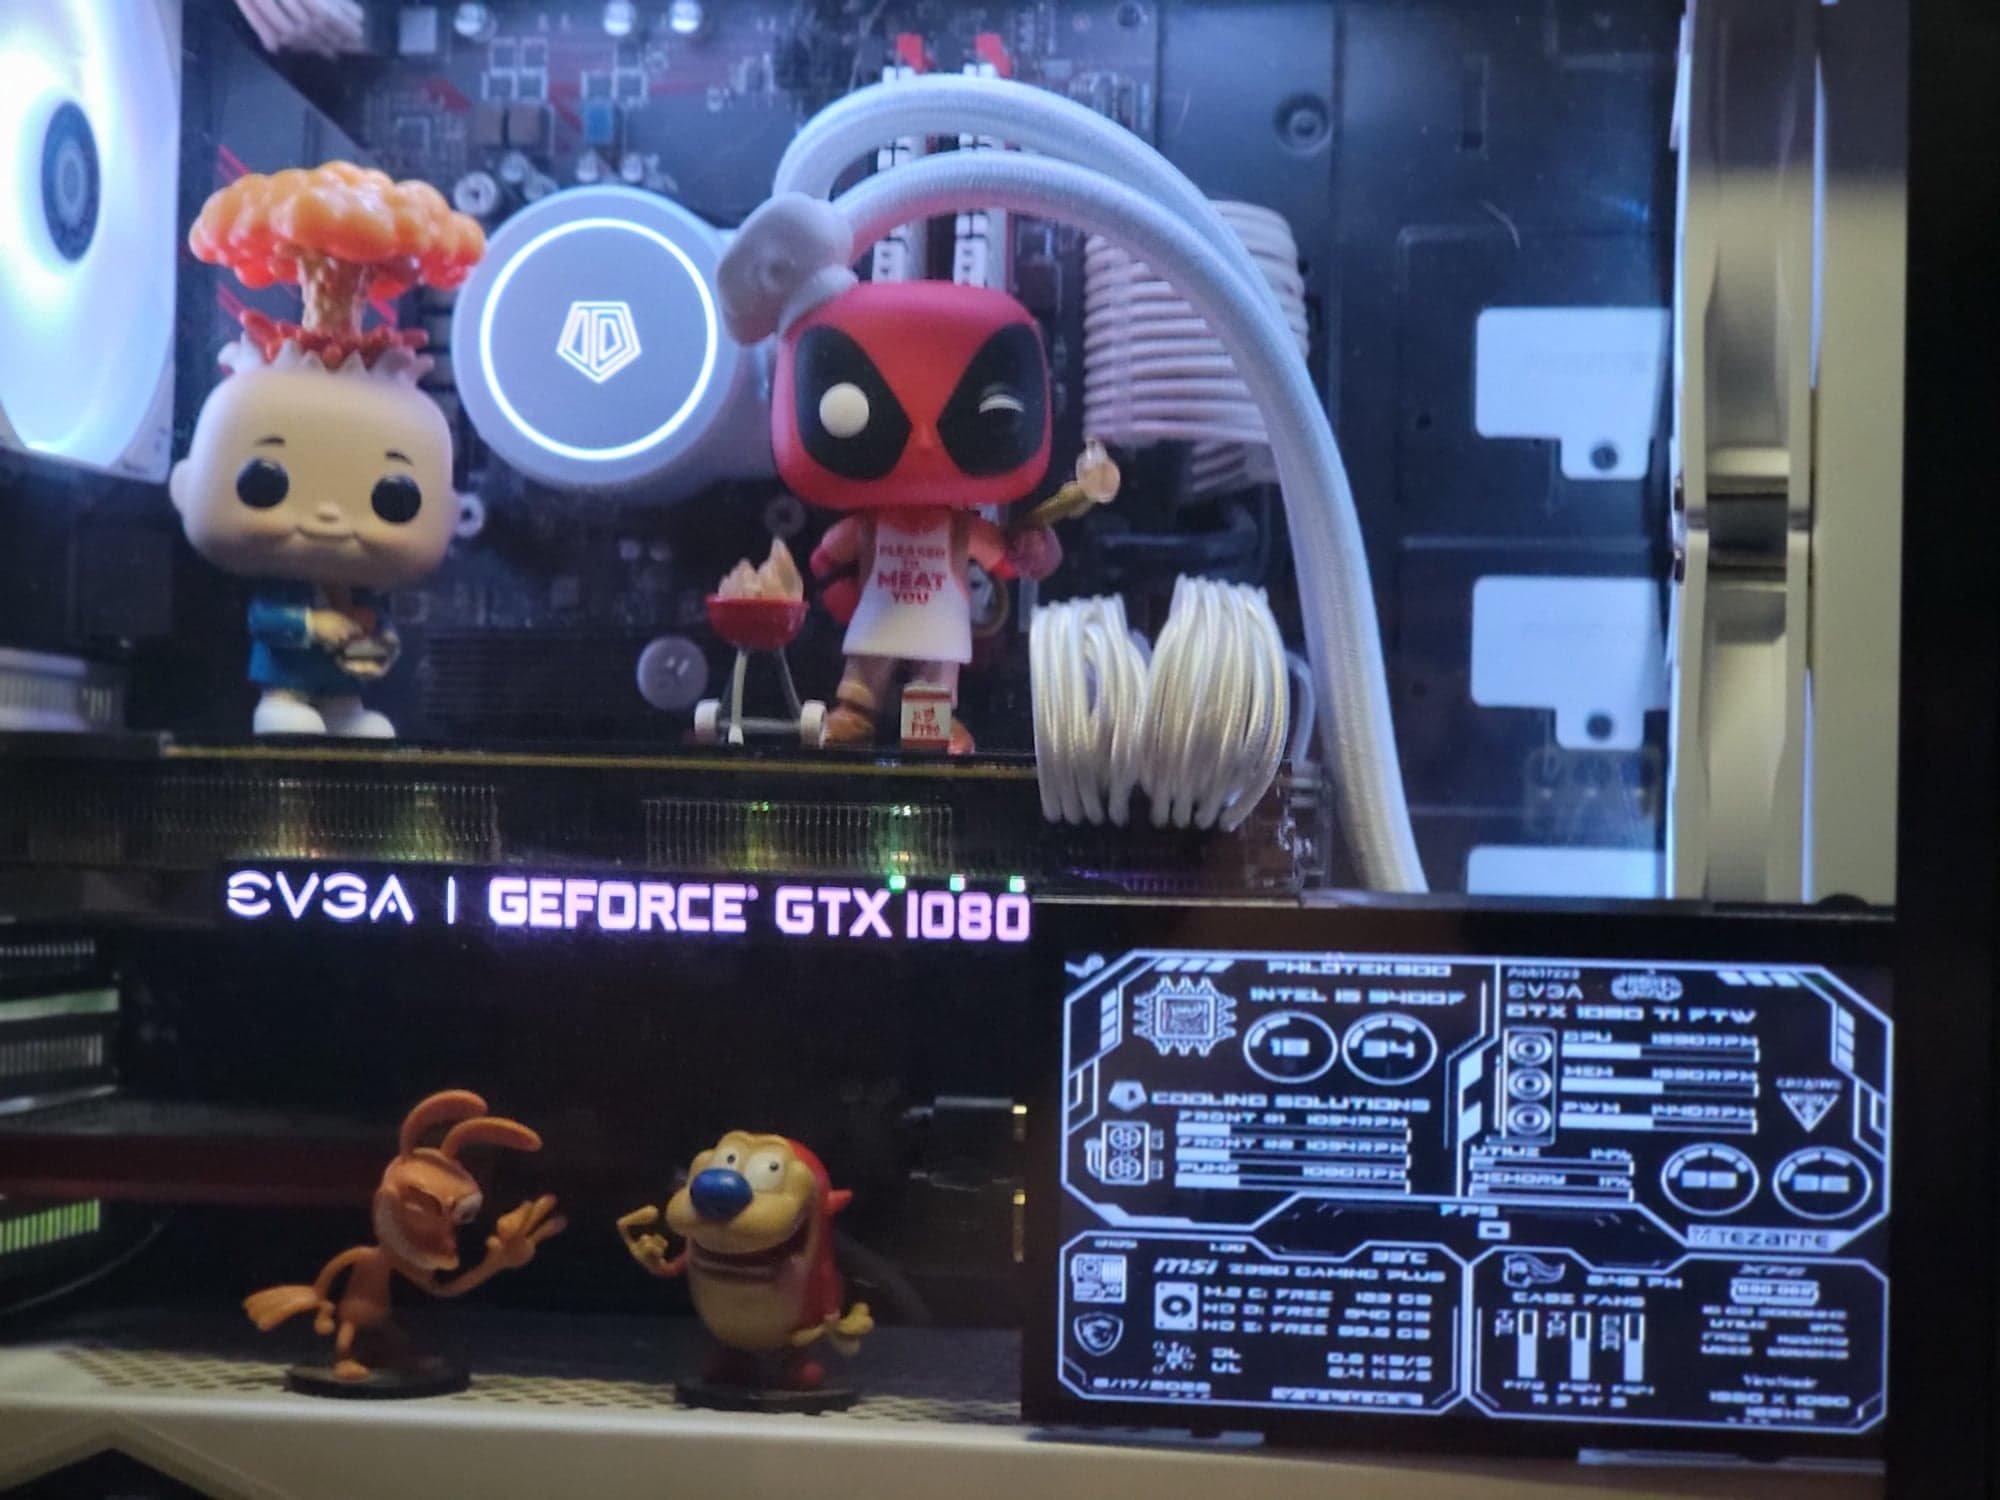
On 6/17/2022 at 9:16 PM, sherbanater said:
First project on a dedicated 7" monitor at 800x600
Questions and Comments welcome...thanks
CyberPanel.rar 13.11 kB · 12 downloads CyberWhite.sensorpanel 254.55 kB · 15 downloads

Great display. Looks great.
You should clean up your desk though. Then you wouldnt have to put stuff inside your PC case.
-
1
-
1
-
-
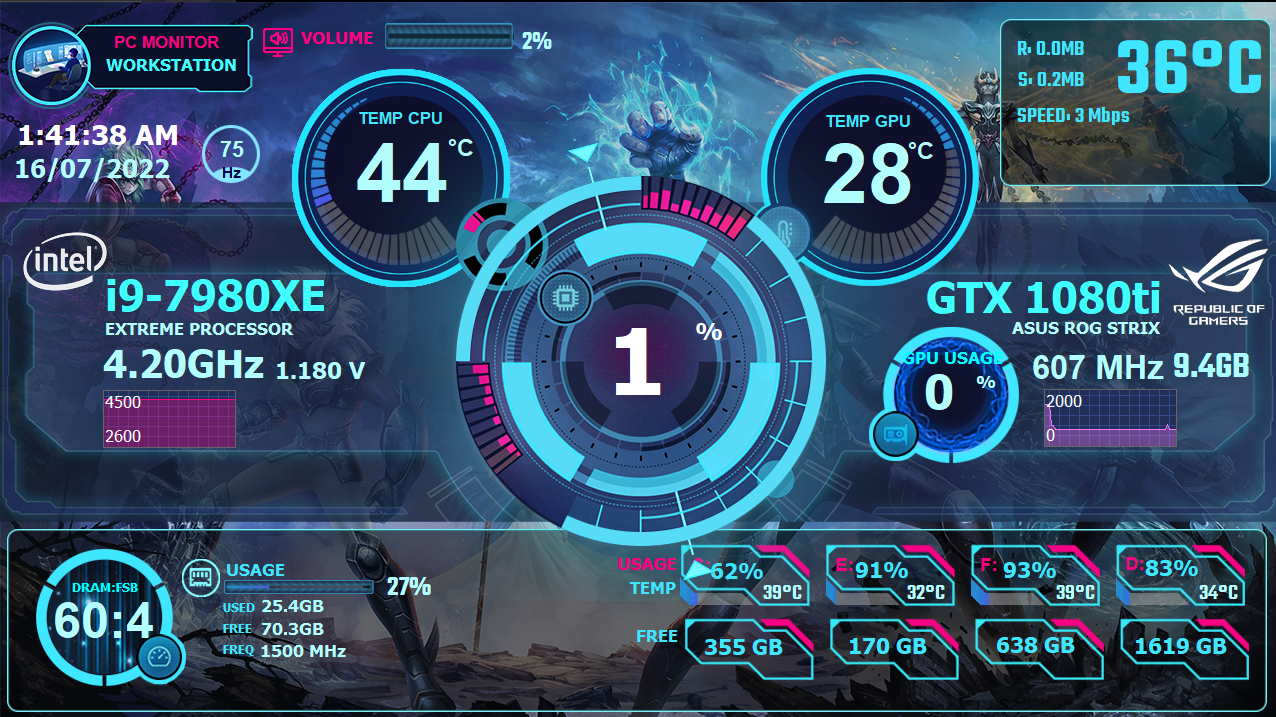
On 6/6/2022 at 1:41 AM, Danny Pan said:
how do you do the animation?
Good luck getting an answer. Seems the premise of the forum has been lost. Its not about discussing and sharing ideas any longer, as it once was. It seems to be all about monetary gain now. Sad.
-
1
-
-
8 hours ago, COSTAJUNIOR said:
The panel is set to semi transparent. There is a ROG wallpaper showing thru.
As far as the sources go, the wallpaper was downloaded from the net. The back ground is a combination of boxes I pasted together in MS Paint. Then resized to my display. The font is Digital7.
Gauges are by RyuHyeolSin
Boxes are from operbico's panel
-
2 hours ago, Tyluh Rawrmen said:
I have received some templates in a recent purchase I made on Aliexpress but none of the templates will import properly, anyone have any ideas? Id be happy to share them all if we can get them to work
What are the file extensions? Several different file extensions can be used. Depending on your display and the panel downloaded, scaling might be off. In this case you will have to make the adjustments yourself.
To load a panel, use the Import Button. Change 'Files of type' to 'All files(*.*)' so it shows all files in folder. Double click the file you want, and it should load.
-
1
-
-
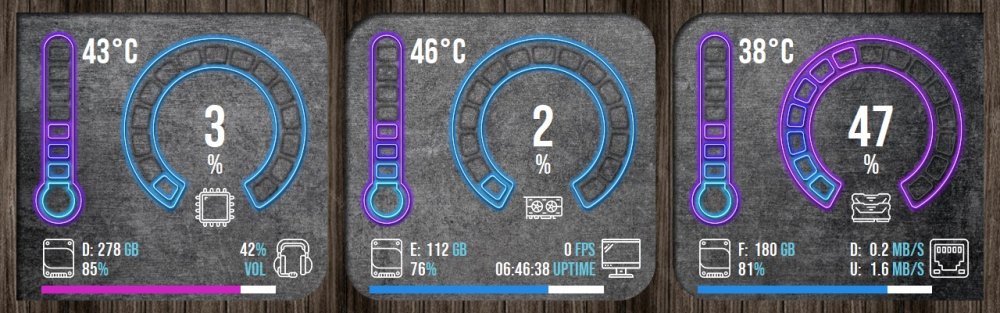
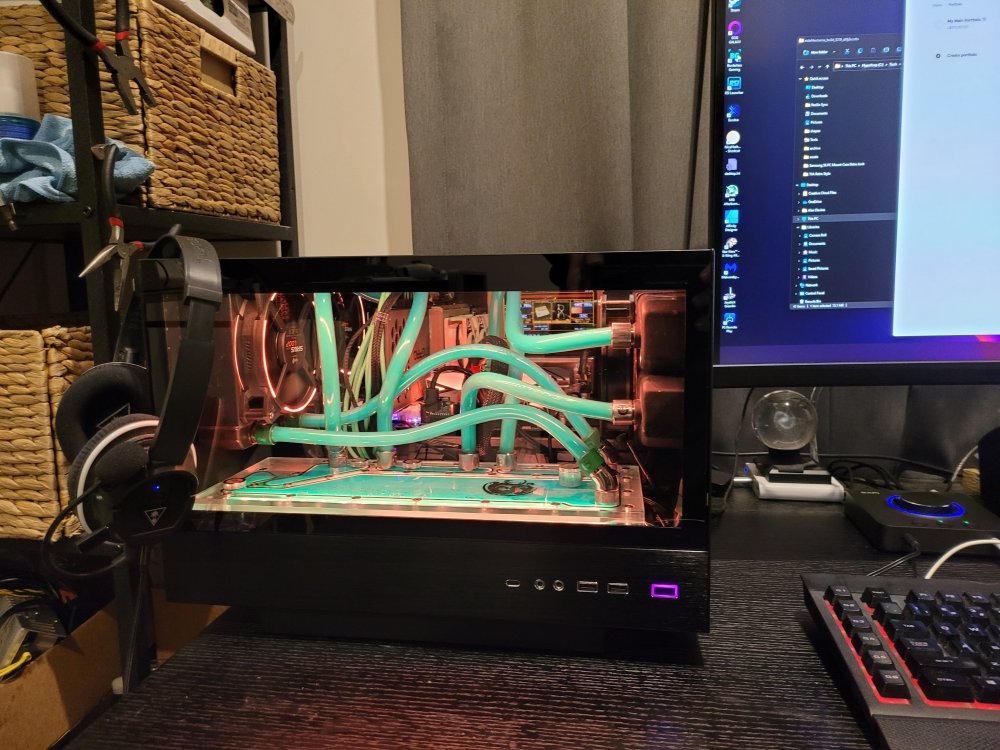
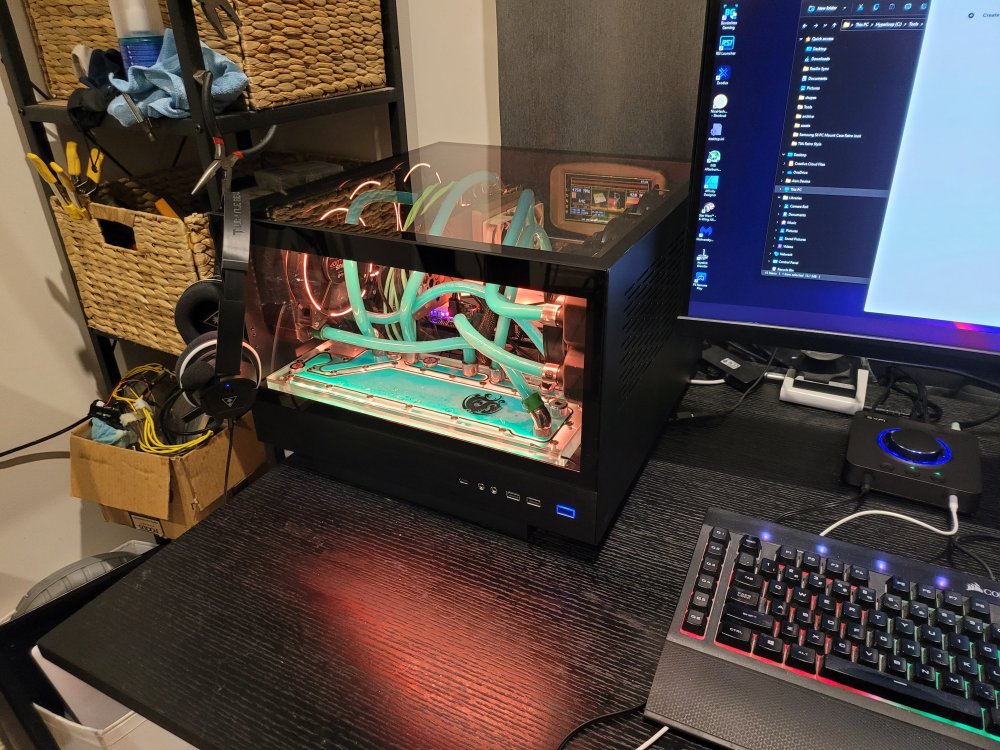
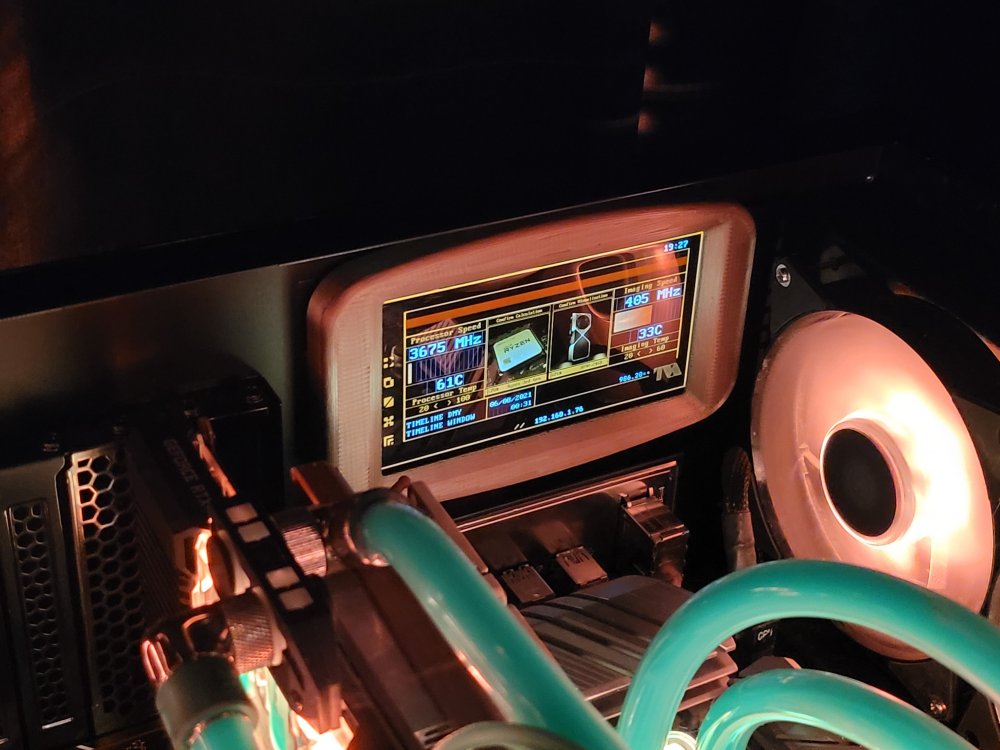
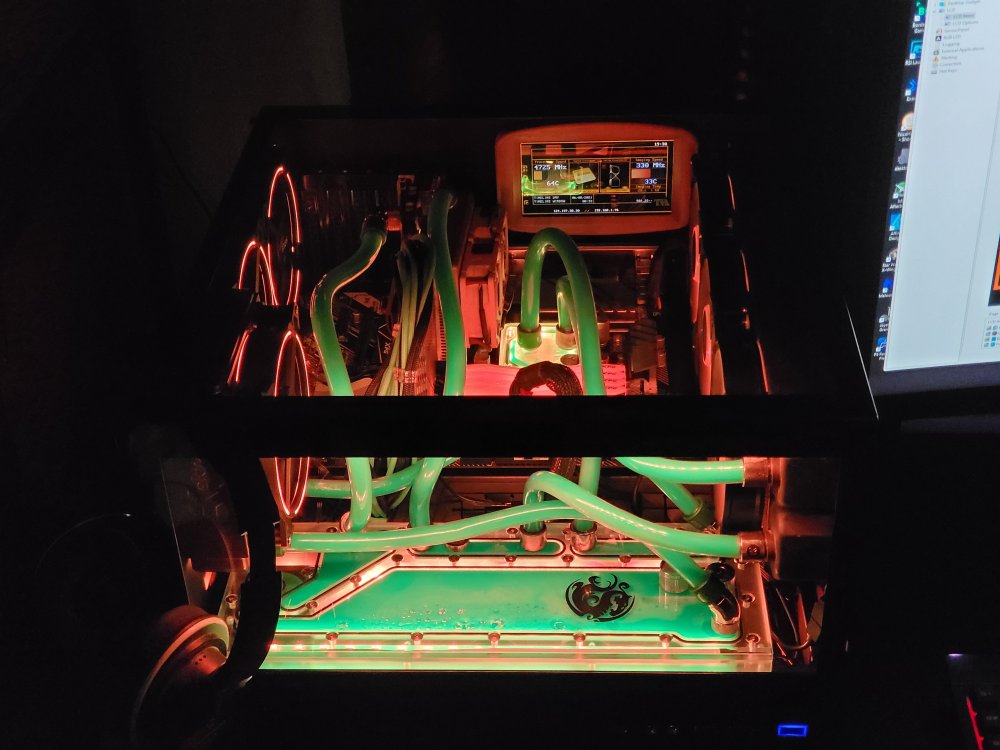
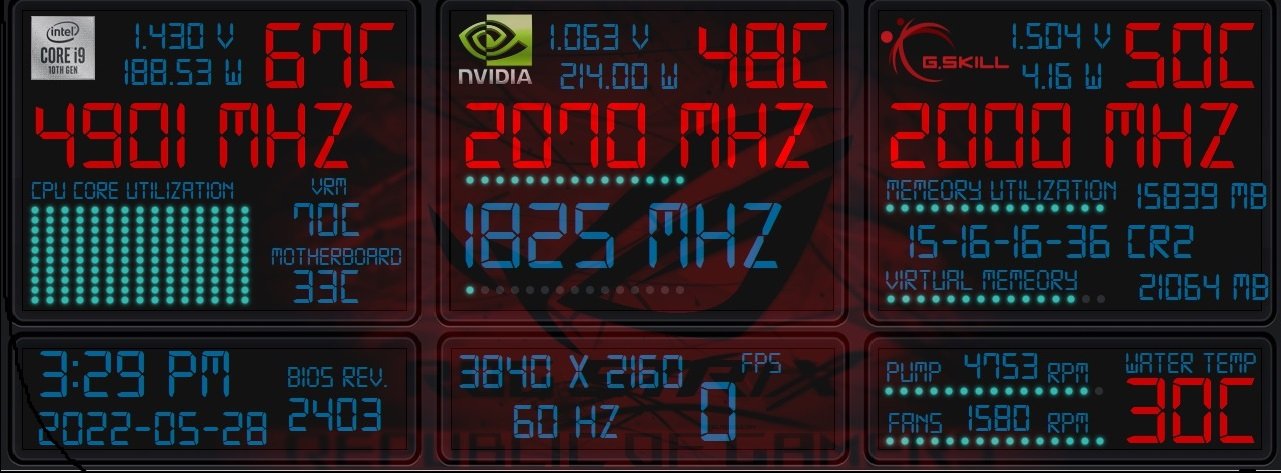
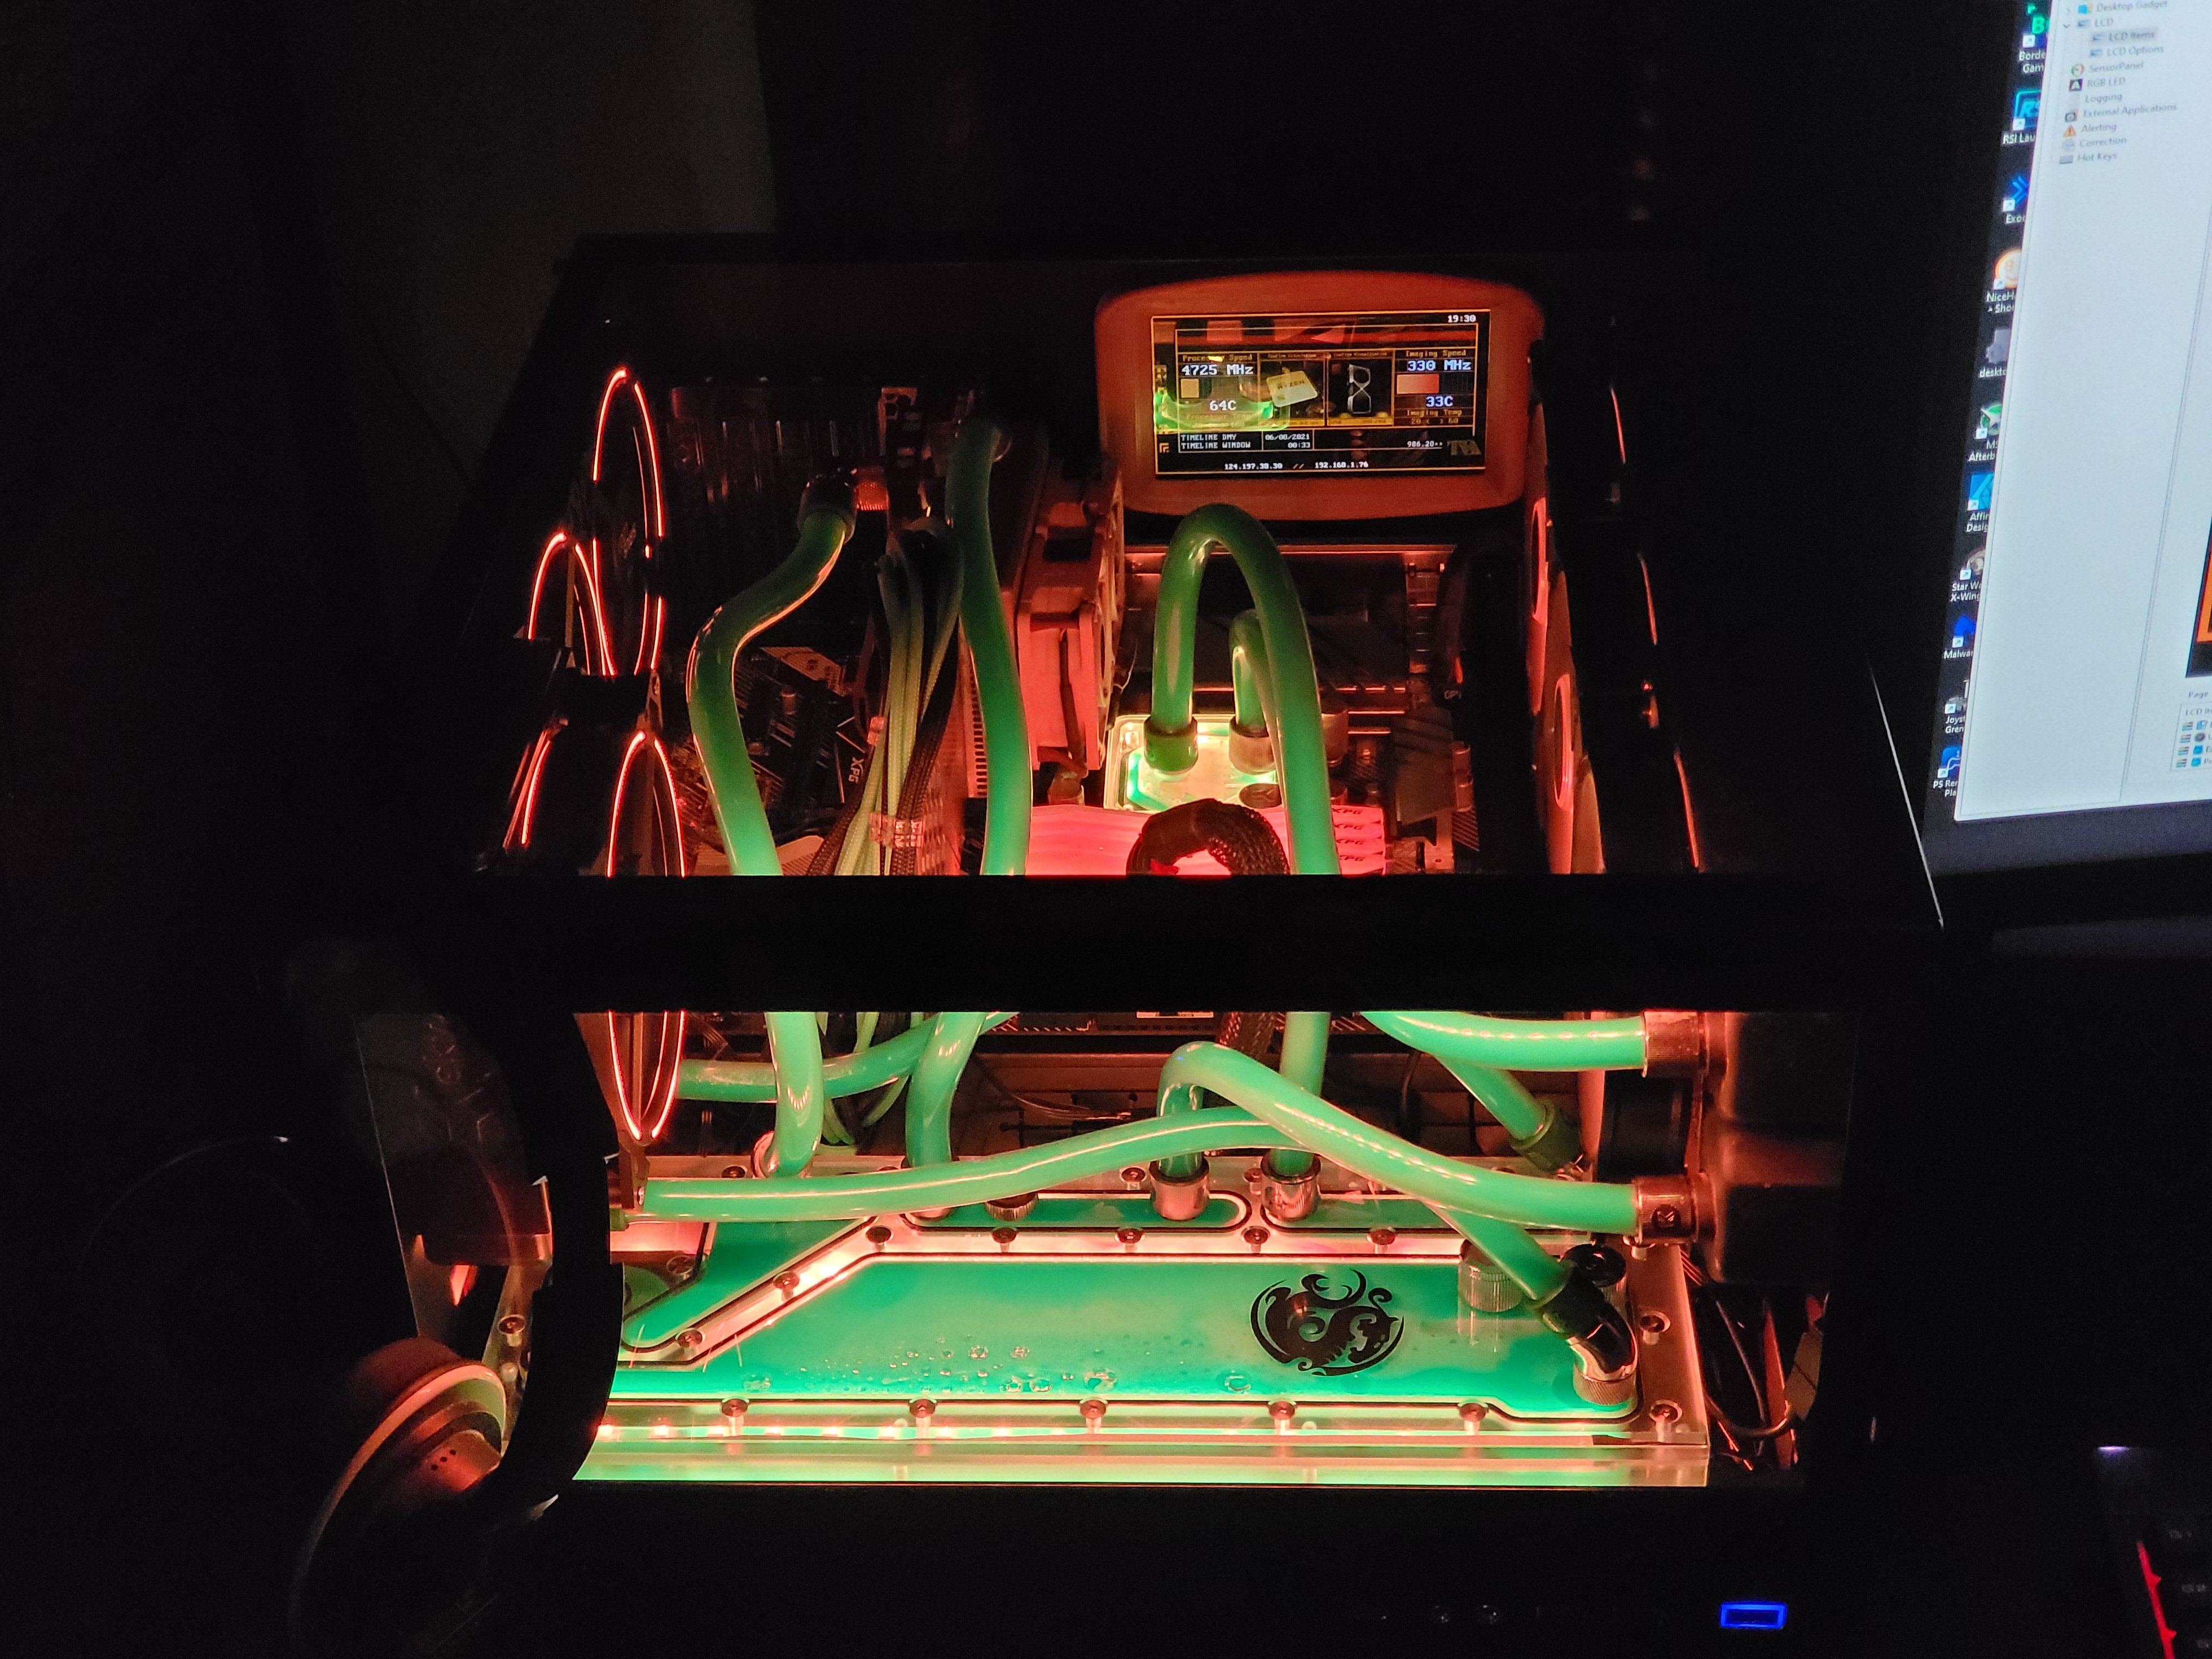
My present panel. 1280X480 6.7" BeadaPanel. A collaboration of some elements found here, elsewhere, and my imagination. Thanks to those that contributed. I have so much stuff in the Aida64 Display folders from loading so many great panels from here. With that said, as much as I want to give credit to those, I am not sure who they are.
EDIT: Screenshot is running Heaven benchmark (4K Ultra full screen) with i9-10850K (all cores 4900mhz), 16GB TridenZ Royal, RTX3070 Ultra.
Custom water cooled if wondering why low temps.
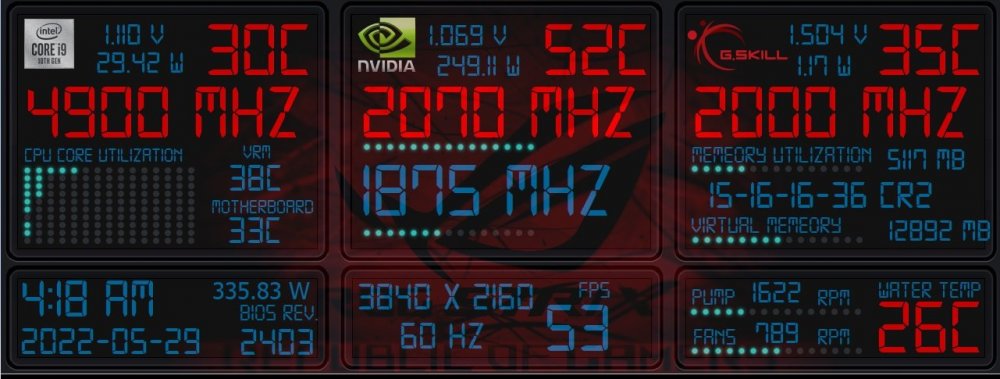
This lower pic is taken during Aida64 Stress Test after 2 hr+. The black squiggley mark is from MS Paint when I was cropping screen shot. Didnt see it til now. lol
2022-05-25red-blue.sensorpanel

-
1
-
-
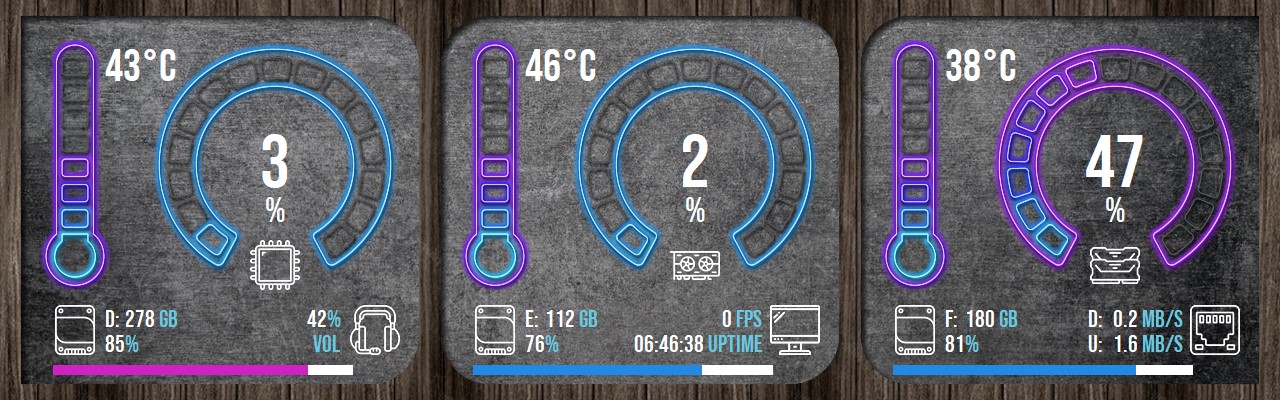
2 hours ago, Tones said:
Here a 1920x480 i threw together. Nothing great in it, threw together with gauges i found in my Aida folder so not sure who to credit. May be useful for someone.
Anyone able to tell me why i cant get GPU clock speed on my sensors? Asus TUF RTX 3080
Is your version a Trial? If so, you will have to purchase Aida64 to unlock all sensors.
-
1
-
-
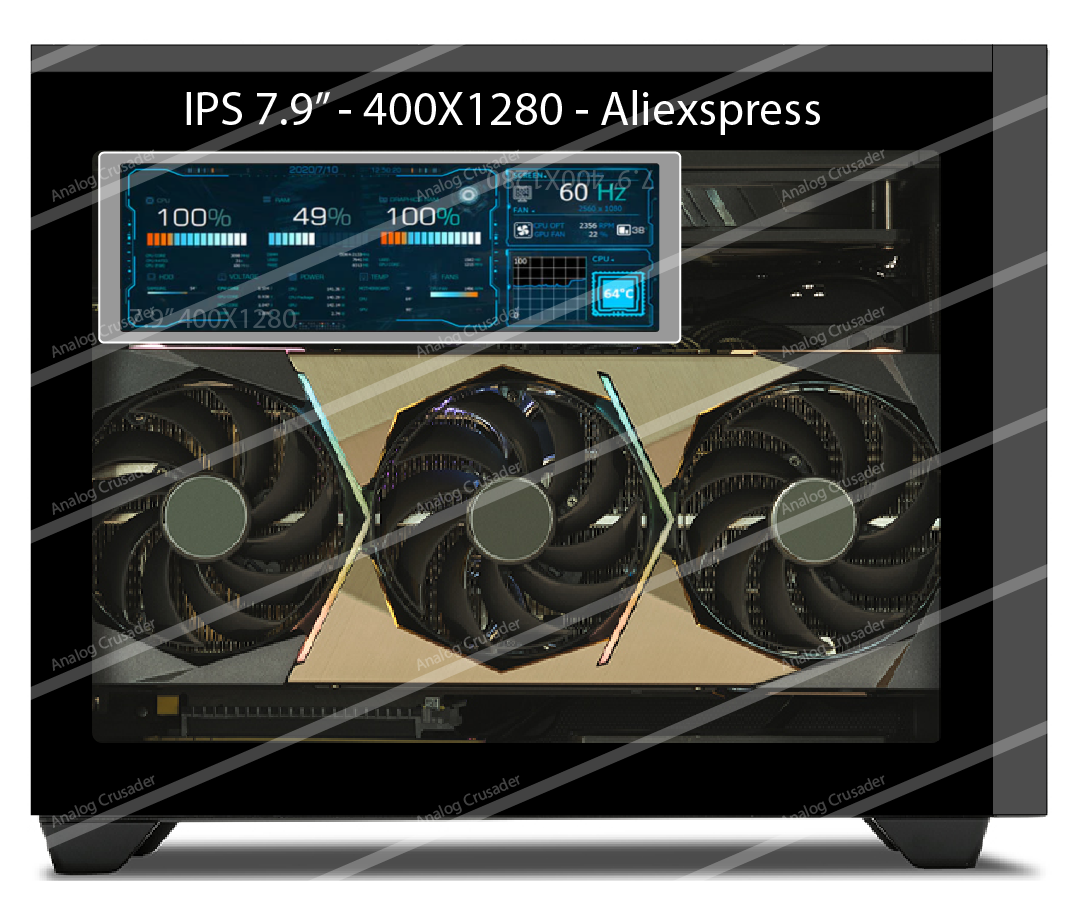
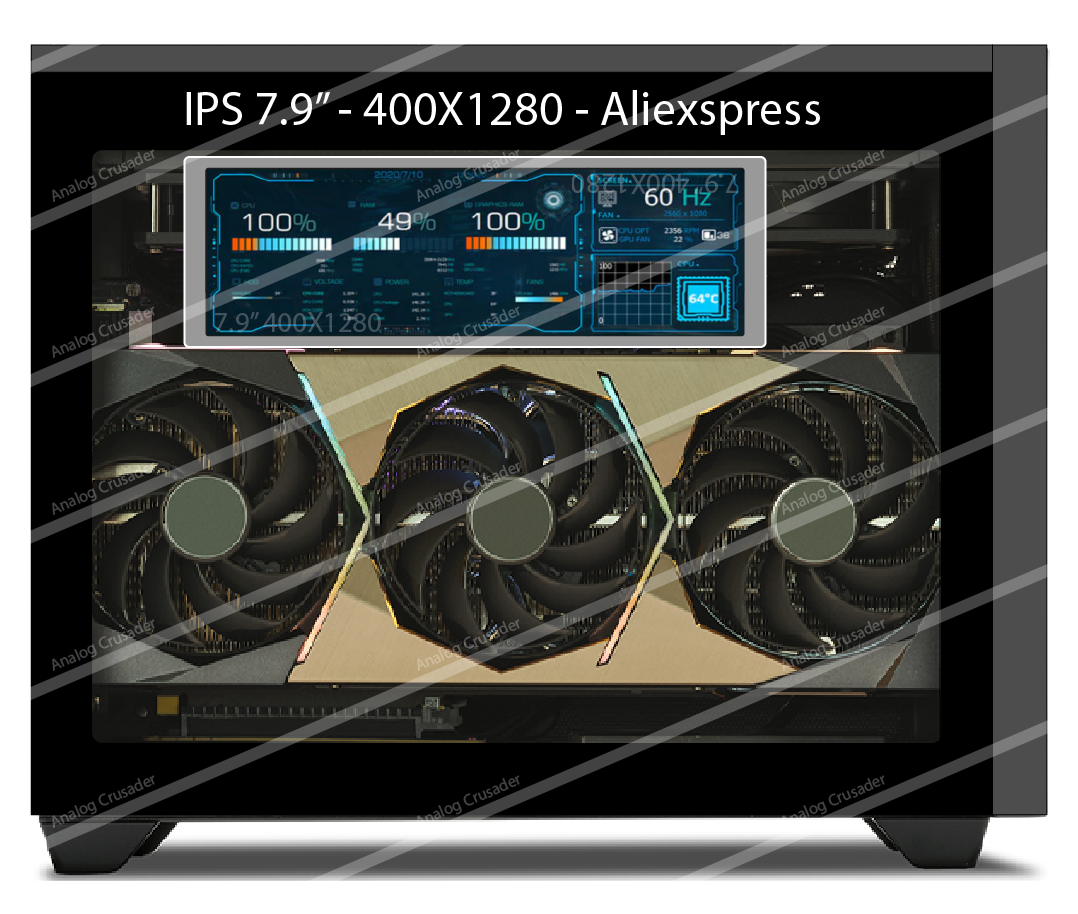
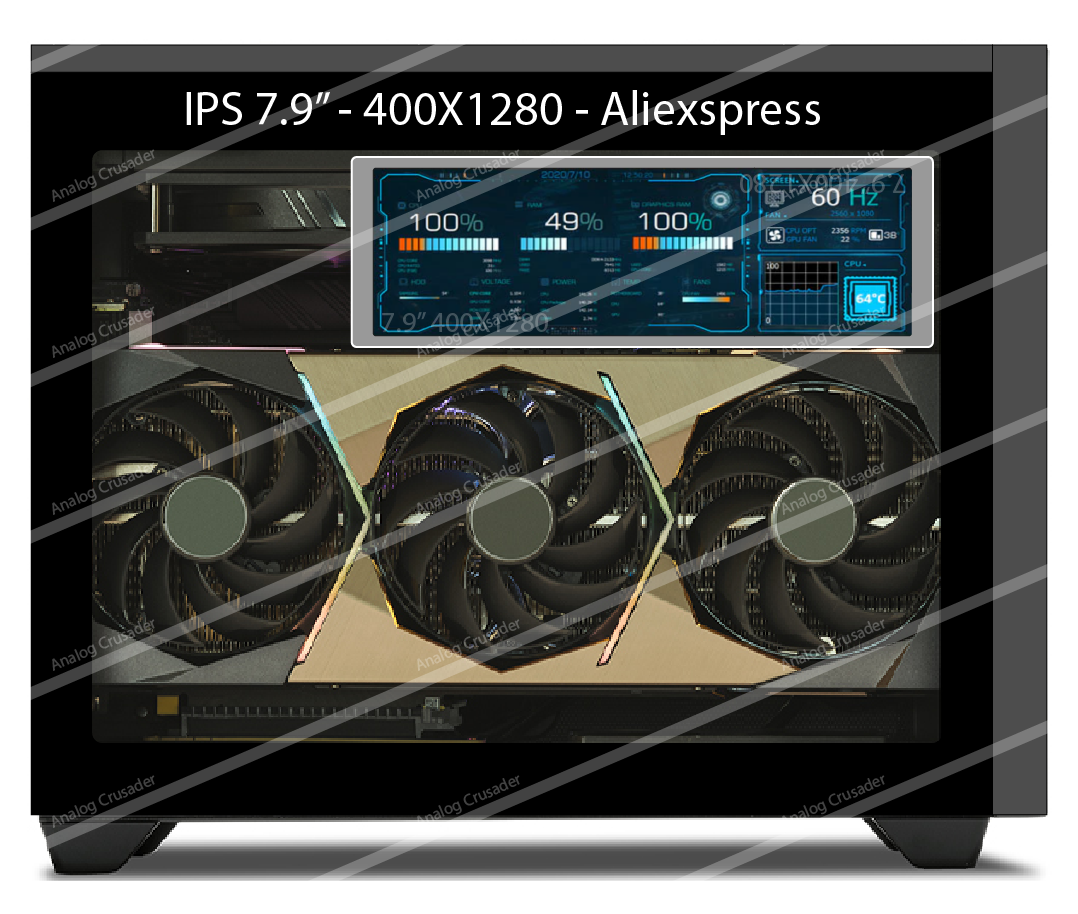
6 hours ago, Analog_Crusader said:
Planning my NR200P max location for a screen with a vertical mount GPU
still waiting for the case so I copied the dimantions from Cooler master's site and combined it with some ref images of a 3Fan GPU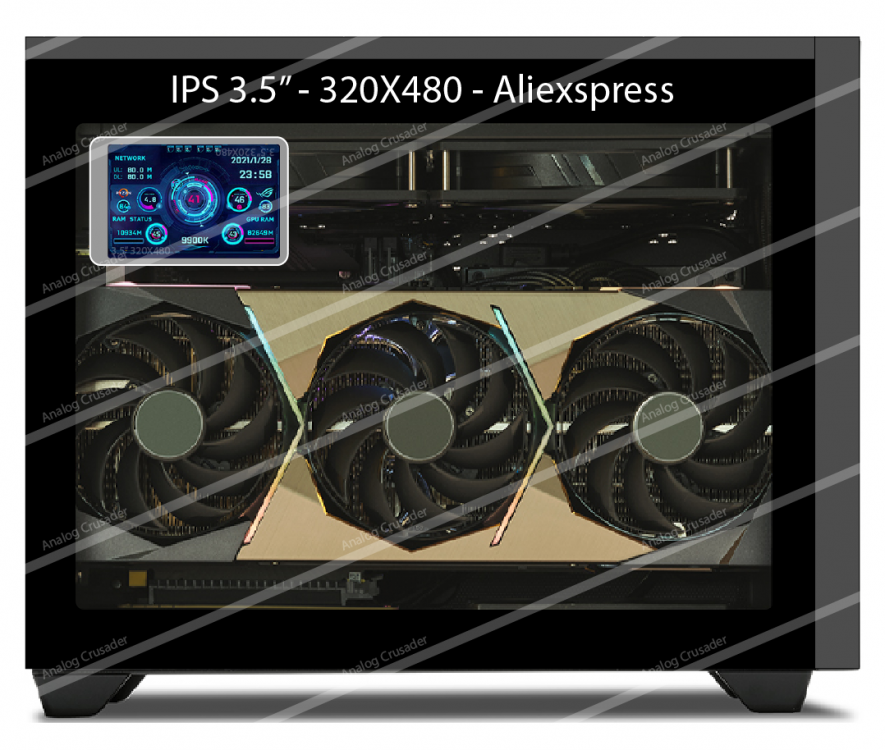


Your only option is far left. Center and right hand side are not an option. You will need the rest of the space for the Graphics Card's power plugs.
Be careful as to what Graphics Card you will be using in that case. A 3-Slot card will be choked off by that side panel if vertically mounted. Unless you dont plan on using the side panel.
-
2 hours ago, Exhumed said:
- Download Aida64 software and install it (trial version is ok, you can buy a license later to unlock all sensors)
- Download a sensor panel what you like from this forum. Some are packed as archives (zip/rar/7zip), others are available directly as sensor files. Each sensor panel was created by a user for a specific resolution. The resolution should normally be applied automatically when importing.
- Open the archive and extract the folder inside or the included files (Sensor panels can have different file extensions (.axlcd, .sensorpanel, .oslcd))
- Start Aida64 and open settings. General > "Load AIDA64 at Windows startup"
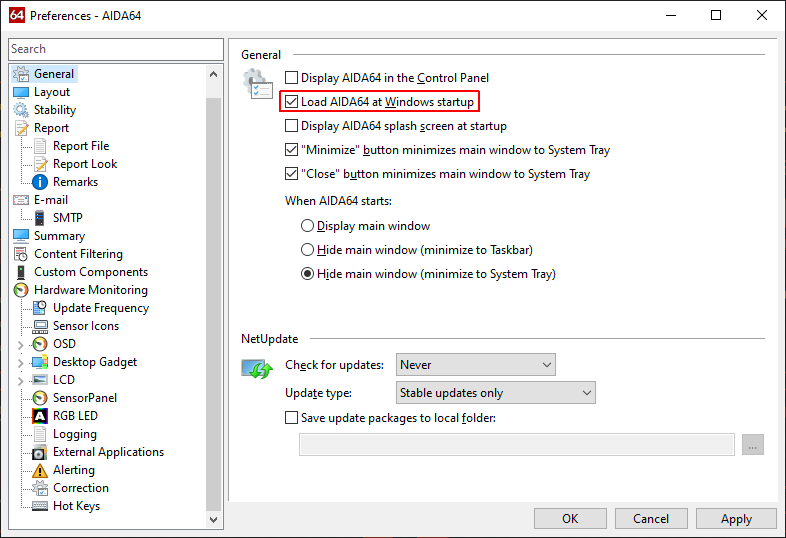
- SensorPanel > "Show SensorPanel" and "Enable context menu" (there is also the important "SensorPanel size" option you need later if you want to make your own panel)

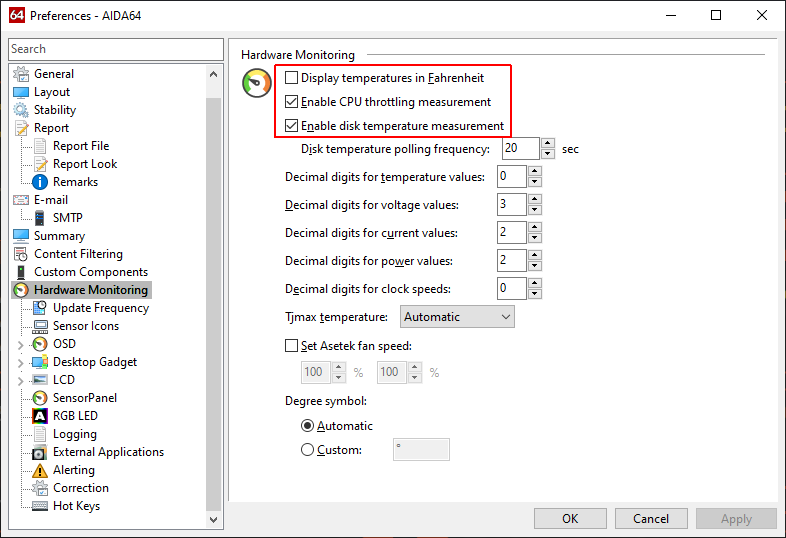
- Hardware Monitoring > Enable these options if you need them
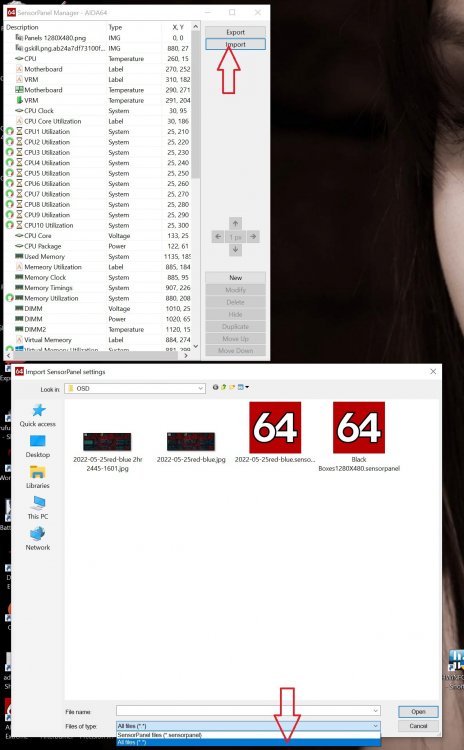
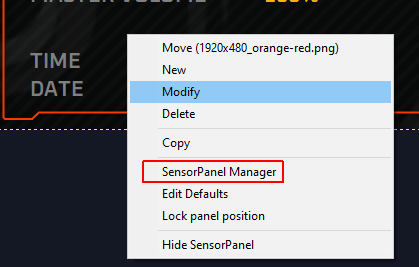
- Import a downloaded sensor panel in to Aida64. Taskbar > "64" icon > SensorPanel Manager
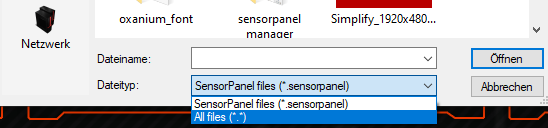
- Click on "Import" to import the downloaded sensor panel. If the file extension cannot be opened easily or is displayed as not loadable, click on "All files (*.*)" and thus import the sensor panel.
- In the sensor panel manager you edit the sensor panel and make any changes you want. All elements are at specific coordinates.
- The background image should always be at the top of the list if one is used. All objects in the sensorpanel manager are arranged in specific layers. At the top of the list is the lowest level in the sensor panel manager and in the sensor panel on the desktop. So exactly the opposite!
- The NSWE arrows (on the right under import/export) are used to fine-tune the selected objects in the sensor panel manager. "1 px" means move one pixel wide the marked object on the sensor panel you see on the desktop. By clicking on "1px" you can change the width to 1, 5, 10 and 20 pixels that a marked object should jump in the desired direction.
- Add a new object under "New". This can be a hardware sensor from your pc or a graphic that is in a folder.
- You can change objects that are already in the sensorpanel manager with "Modify".
- With "Hide" you can hide objects that you want to temporarily hide. Press the button again and it will reappear.
- If you have placed an object and want to adopt the set values such as color, font, font size but later only change the font color, for example, you do not have to completely reinstall the sensor with "New" but can simply clone an object with "Duplicate". This then sits in exactly the same position and only needs to be moved.
- To move an object up or down one level in the sensorpanel manager, you can use "Move up" and "Move down". On the one hand, this can be used for clarity and also be practical, because objects that are one below the other cannot be edited by right-clicking on the open panel on the desktop because another object covers it and instead is selected when you click on it.

Add a new sensor. Select the "Item Type" and then select a pc sensor you want to see in the panel from the long list. Set the Font, Font Color, and Font Size, Show label (type something there for testing), if you want a name next to the sensor values and click "OK".

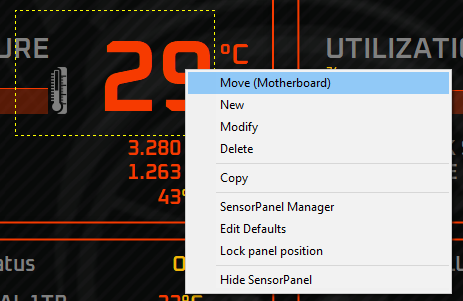
The sensor is now displayed on the desktop on the top left of the previously imported sensor panel. With a right click on an object (yellow dotted line) and a left click on "Move ..." the object can roughly be moved with the mouse to a different position within the imported panel.
All the rest of what you can do with the program would lead too far as instructions. Just experiment with the options that the program offers you. Try and fail motto.

Great write up Exhumed. I have been messing with sensor panels for years and I learned a couple things from this. Thanks.
-
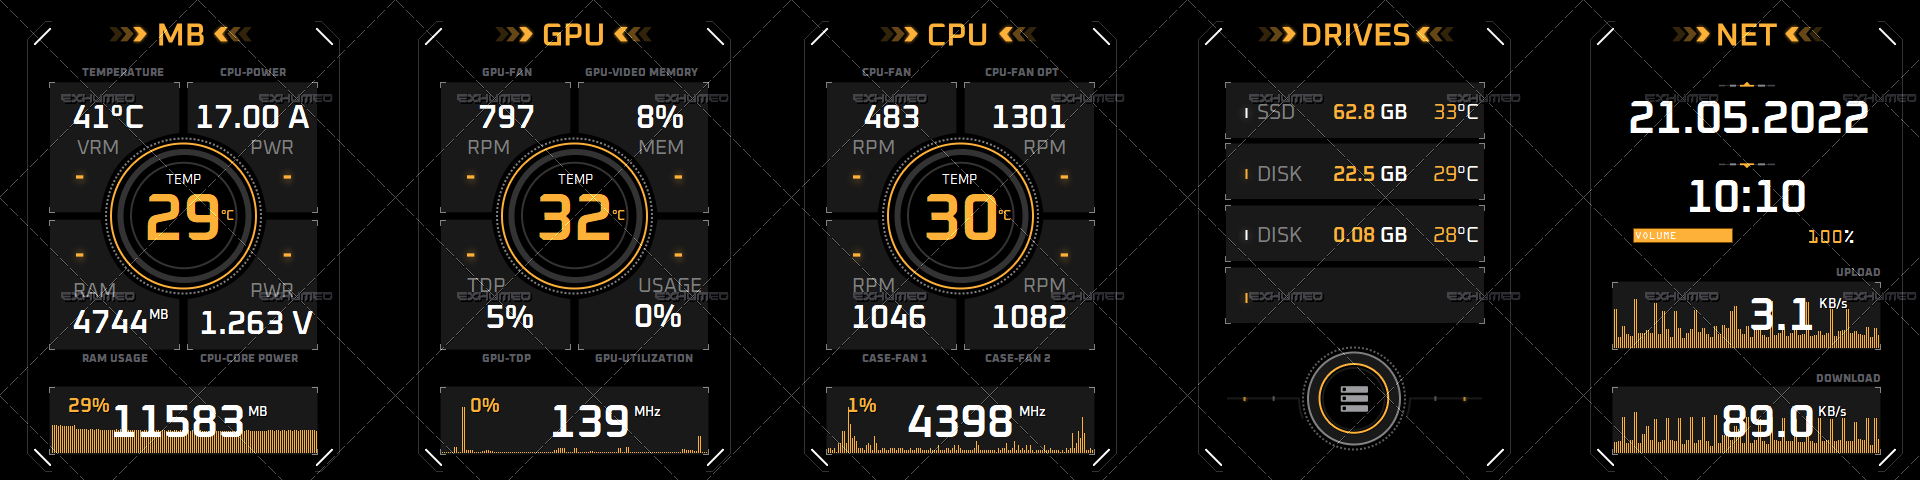
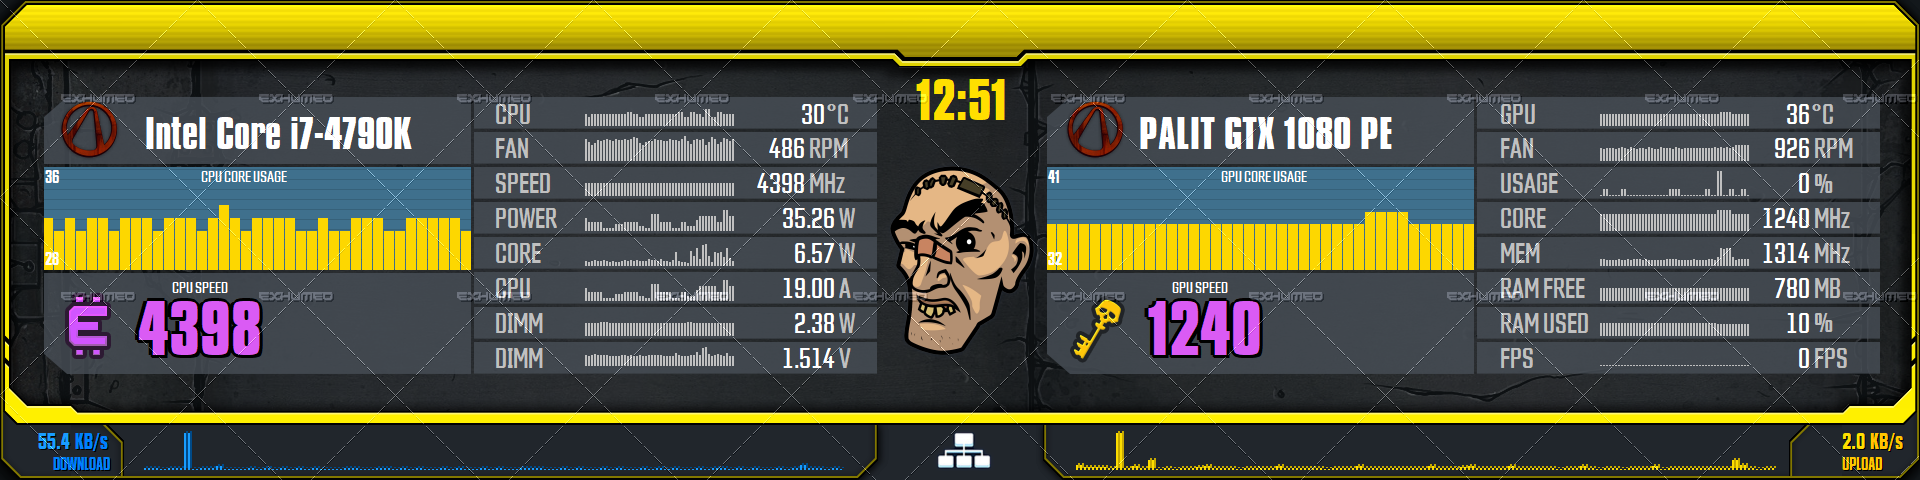
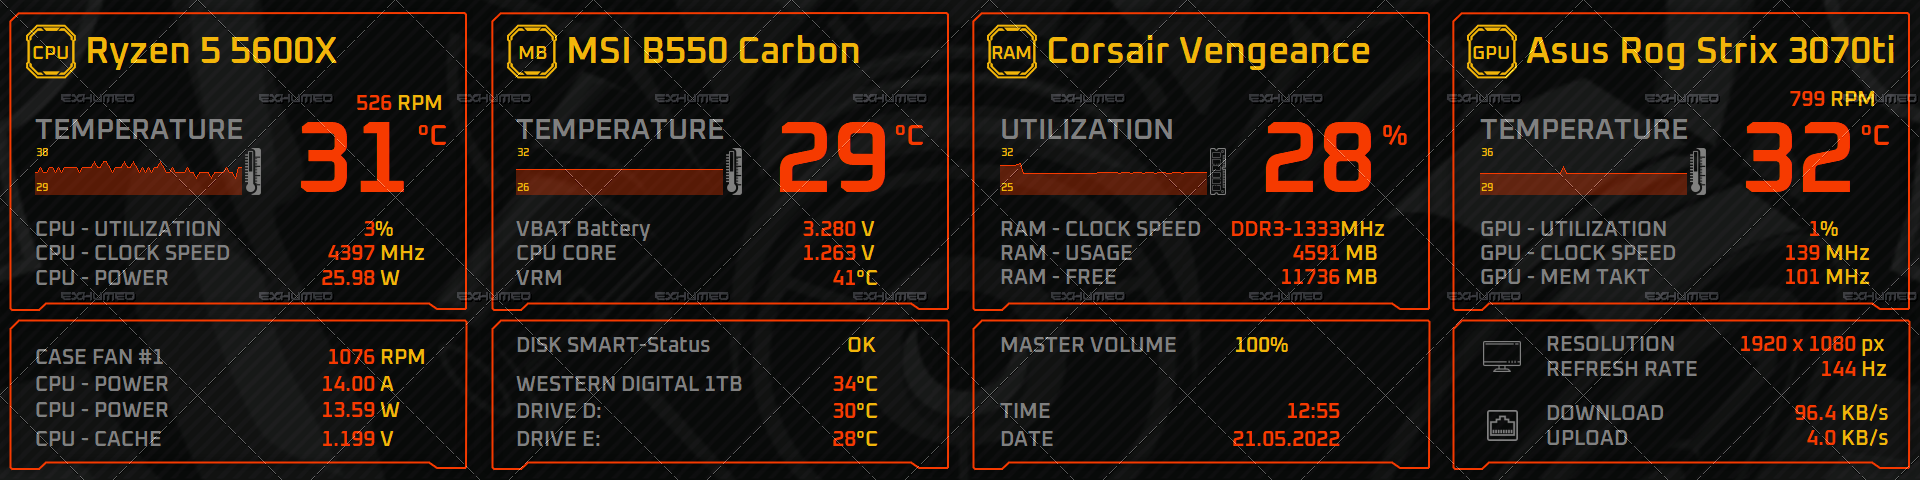
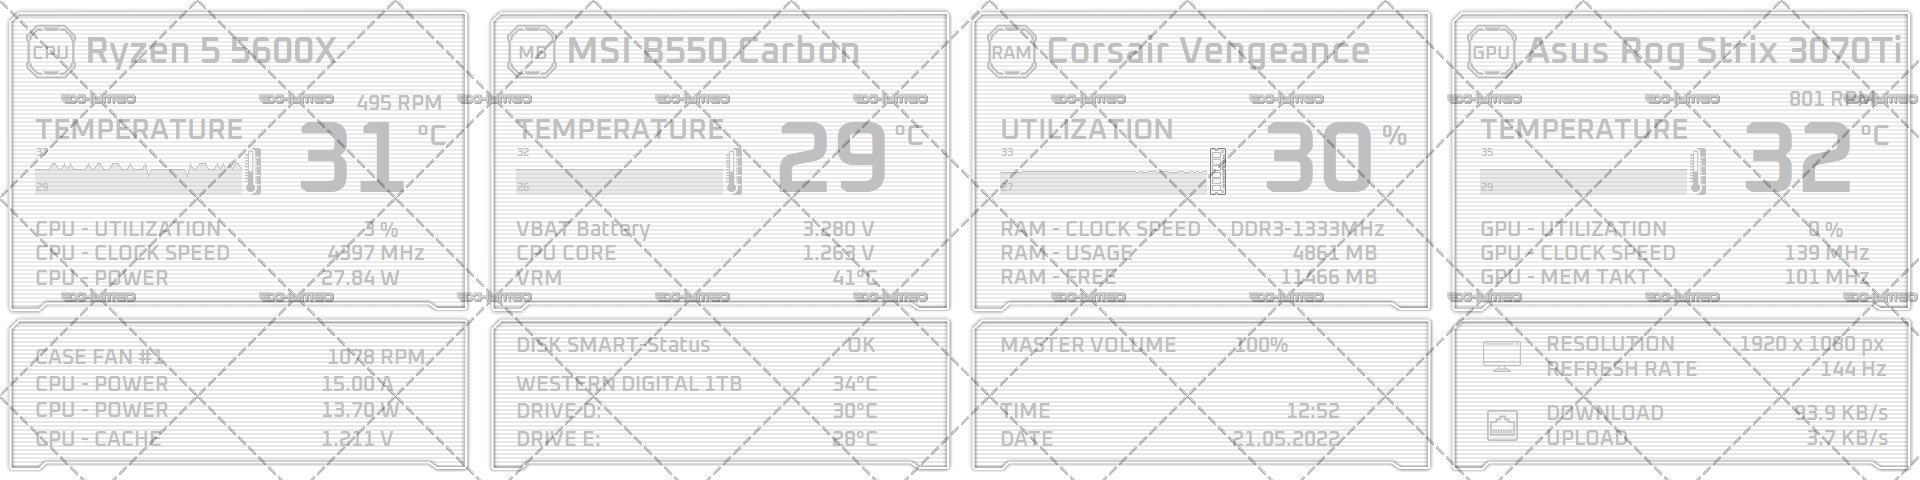
10 hours ago, Exhumed said:
Custom panels for customers, some newly created and modified from existing panels.
Interface 101 - yellow/orange version (1920x480px)
Borderlands 3 - Version 1 (1920x480px)
Simplify v2 red/yellow (1920x480px)
Simplify v2 white/grey (1920x480px)
Simplify v2 colorful (1920x480px)
MSI - black/grey (600x1024px)
Borderlands 3 is free right now at Epic Games. Get it now before offer gone.
I have 2 copies now. Paid for one last year. Grabbed a free one yesterday for my other account.
-
2
-
-
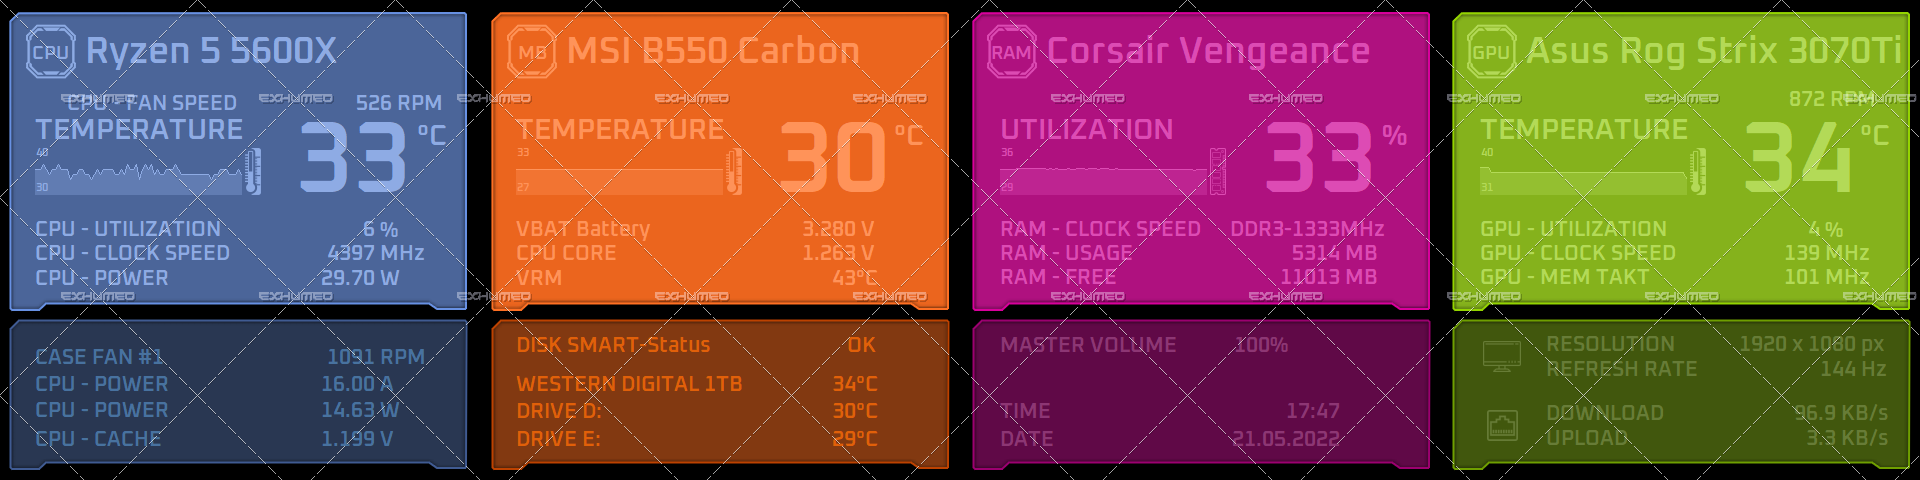
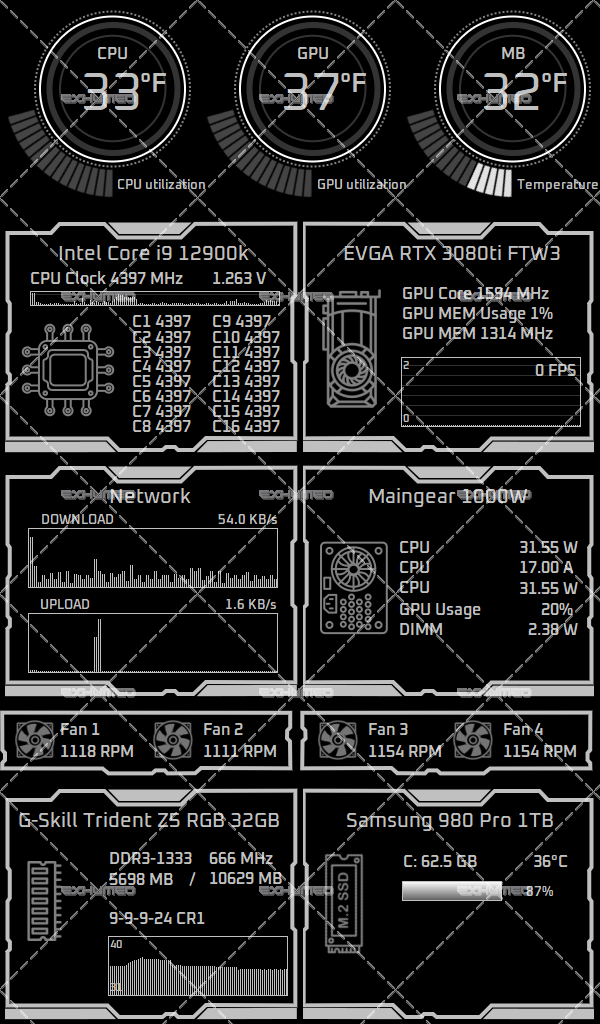
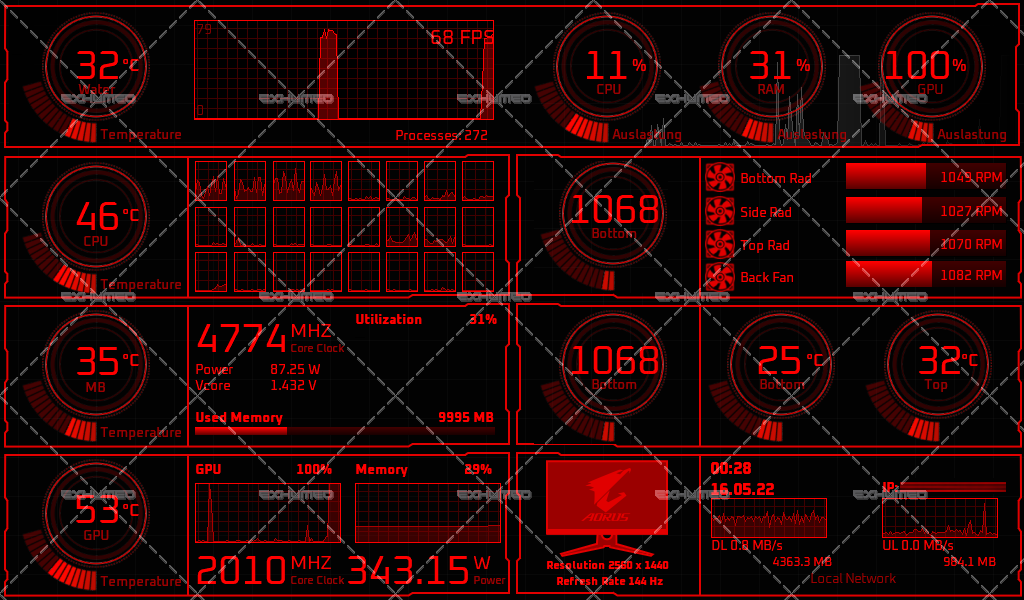
12 hours ago, Exhumed said:
Another commissioned work. The basis was the MSI panel shown here recently but with a different arrangement. Water cooling is installed here, so a different layout. Sensorpanel size is 1024x600px. Gif animations shows possible color variations if someone wants a different color style. I also added custom fan icons and the Aorus monitor as a bonus.
If that is commissioned work, it is hardly fair that somebody else can purchase the same. If I commissioned something, I would want it to be a 'one-off' that nobody else has.
Nice work though. You got great skills.
-
1
-
-
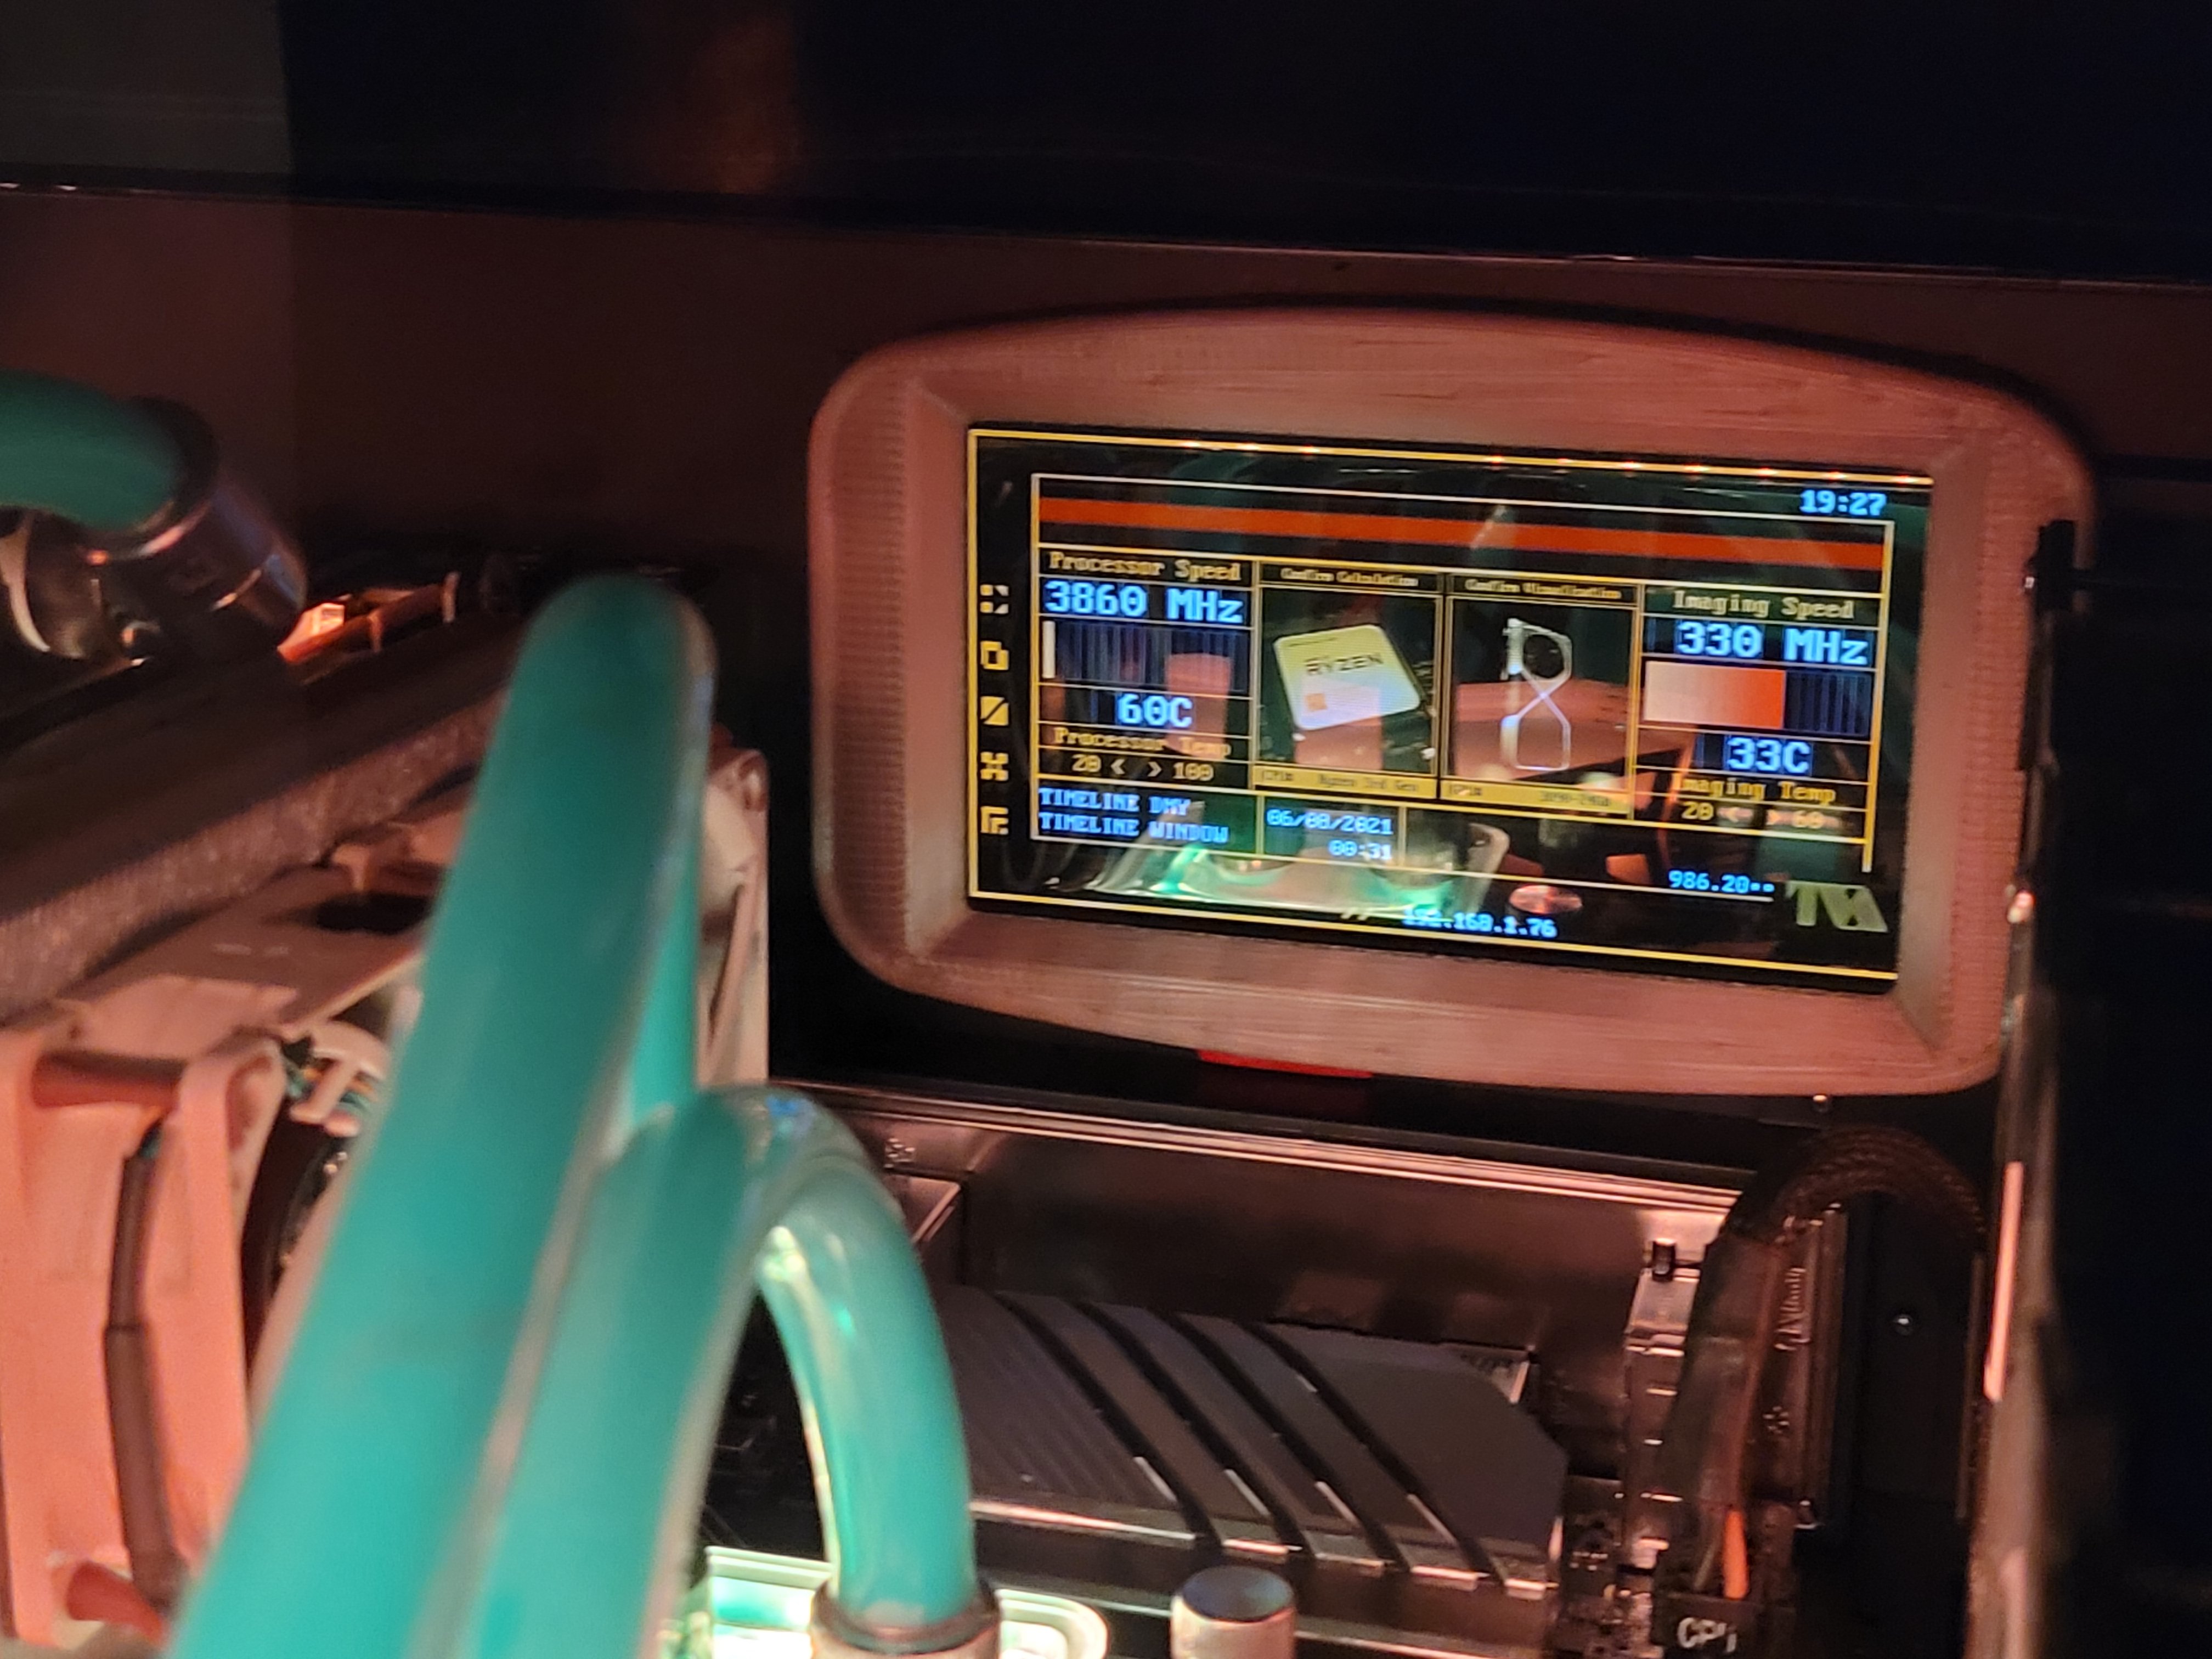
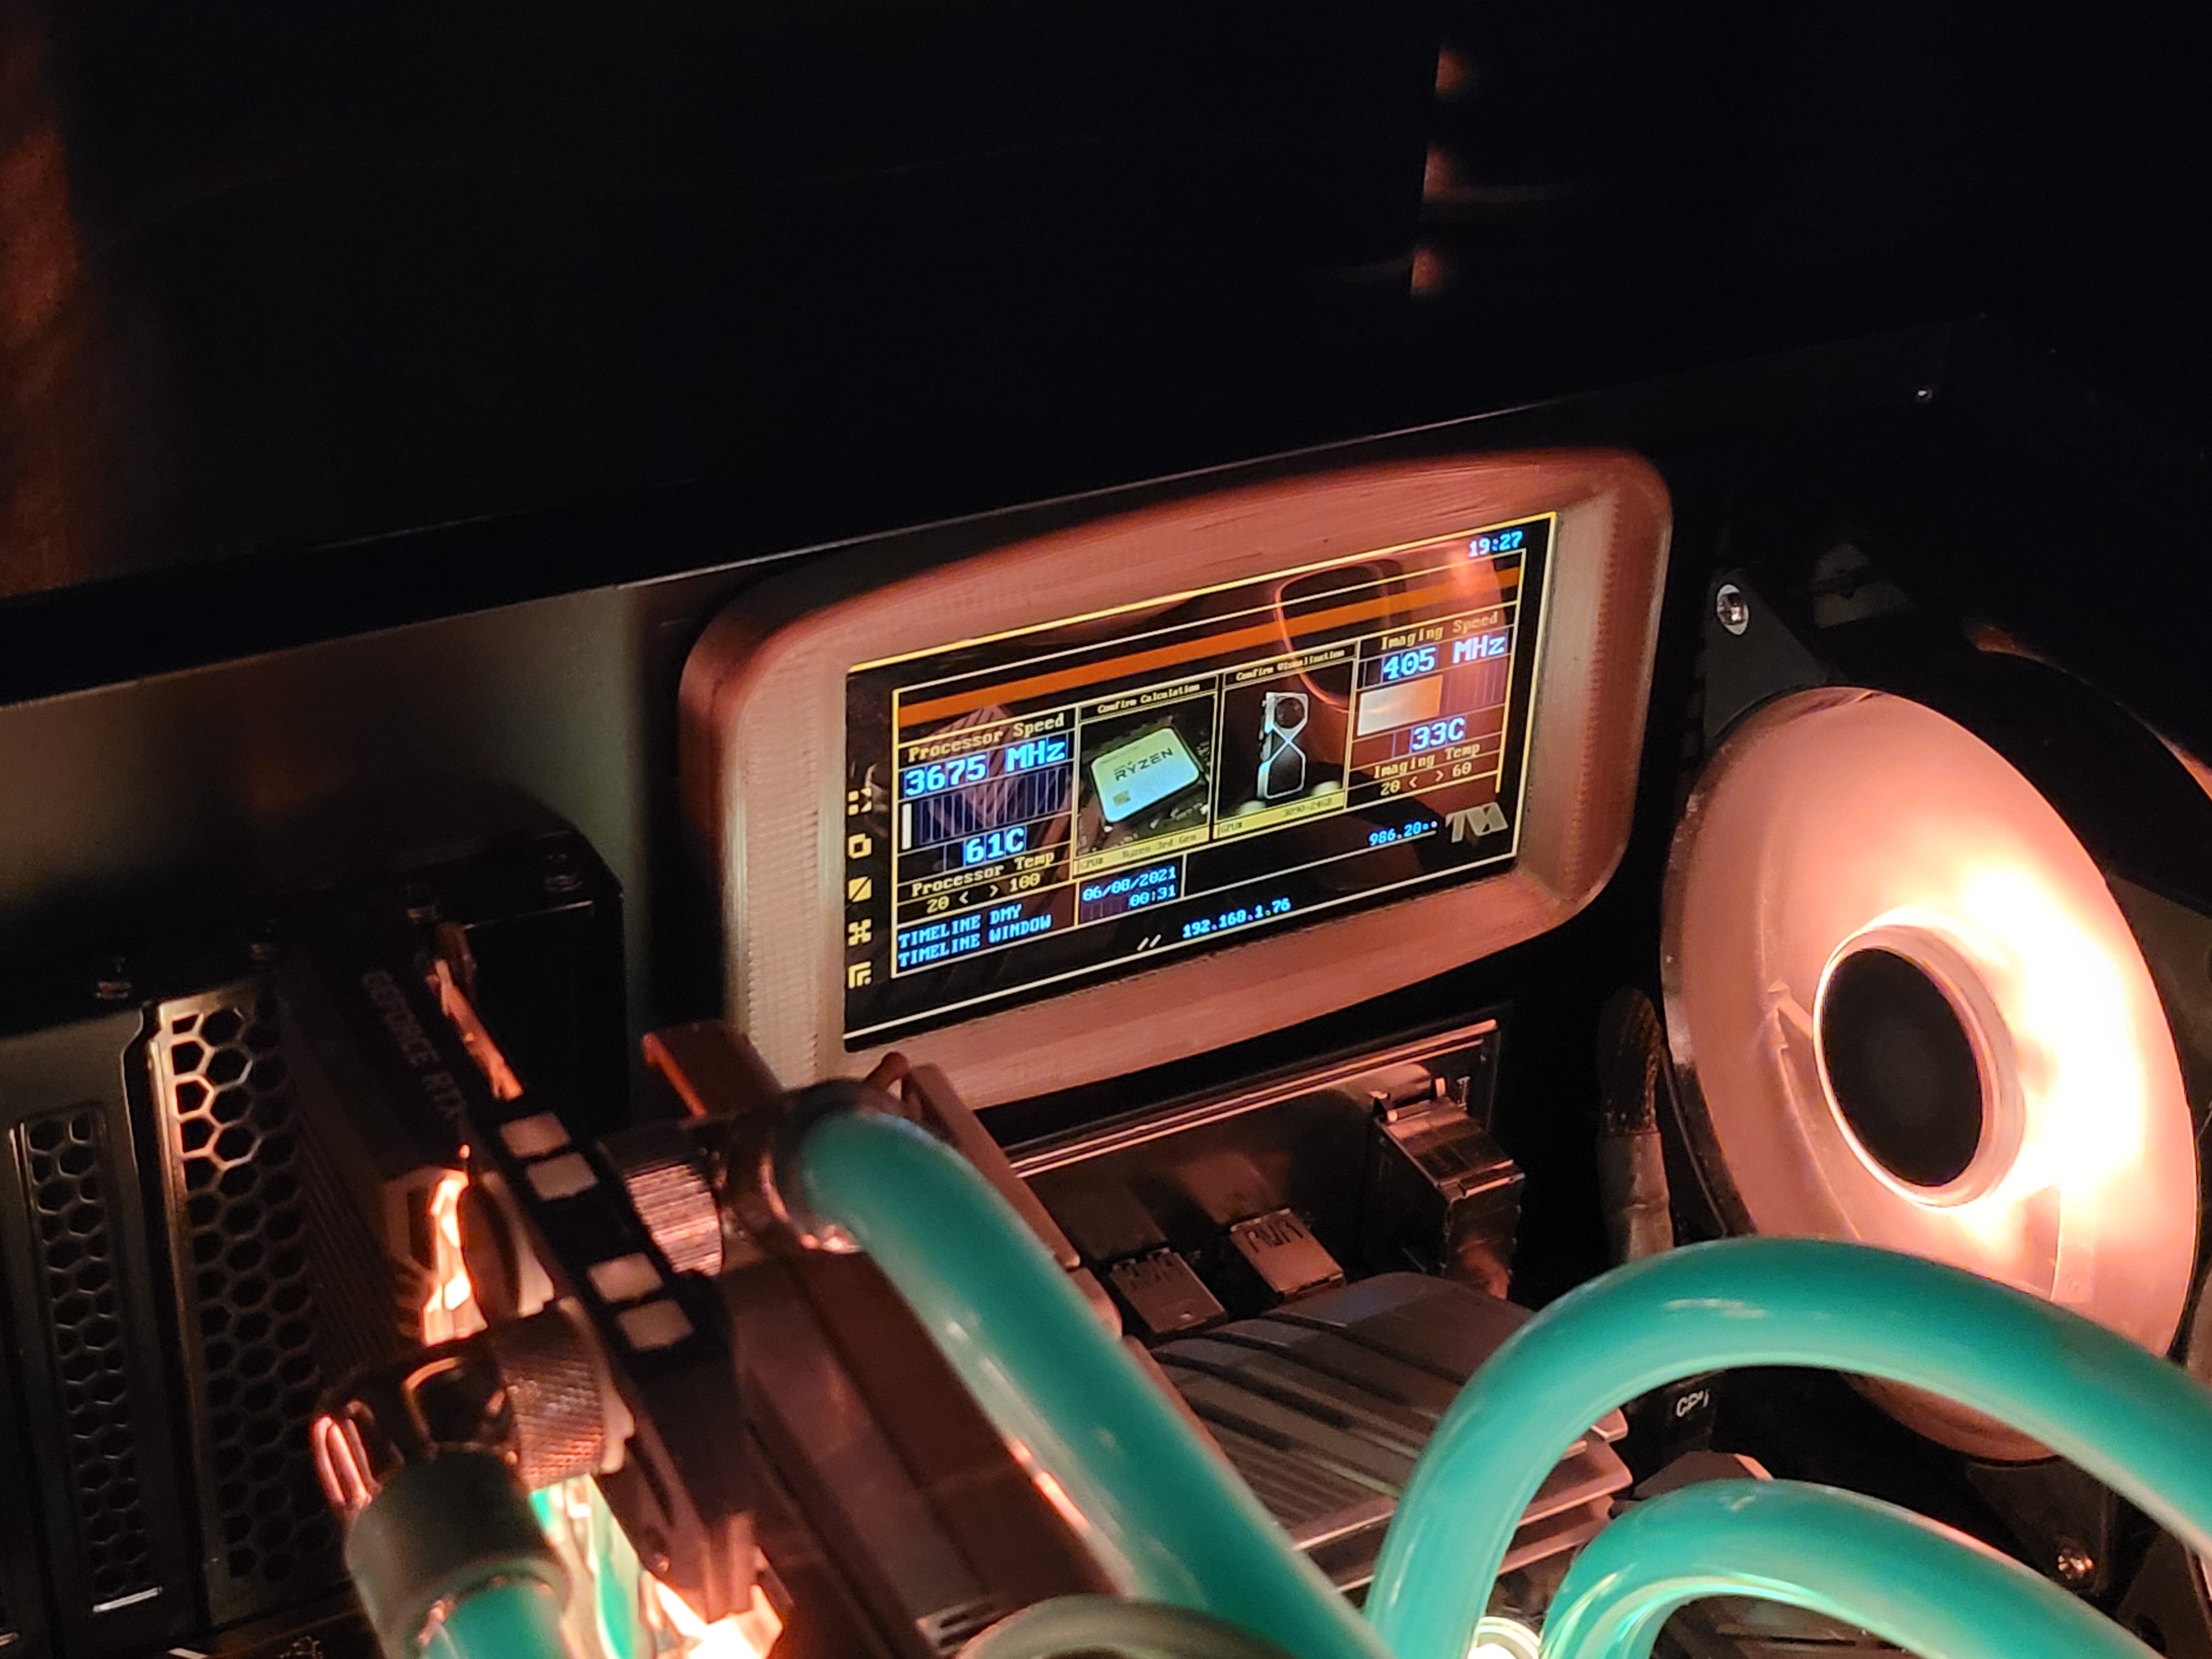
On 8/6/2021 at 4:09 PM, kodachrome said:
I've been making a real simple Loki TVA inspired Tempad interface. For anyone thats seen the show, the TVA are a group based on the design aesthetics of the 60s-late 70s, I loved the look more than the show.
")
2560x1440 for my trusty old (broken as a phone) OLED Galaxy S6, made a frame/case for it in the retro style too and printed it out. Still a bit WIP.

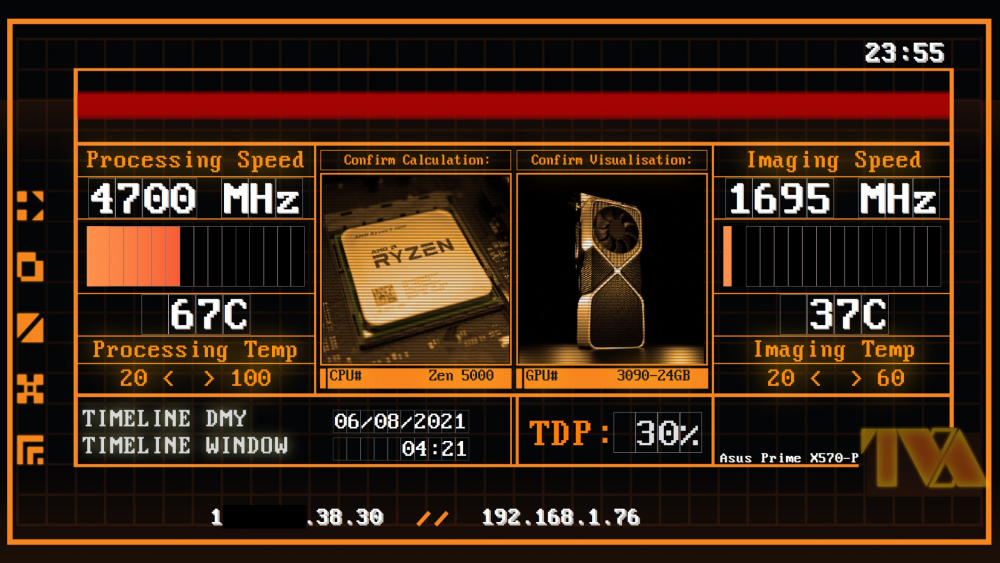
I thought this was a cool orientation for the O11 Dynamic XL PC case. I have a system in the medium sized O11 Dynamic. Never thought to lay it on its side. Very popular case, if not one of the most popular.
-
12 hours ago, ejwalton125 said:
i have given it the good old college try and making a sensor panel is not my skillset.
Anybody out there have a good car themed 1920x480 sensor panel. My end goal is to have a mustang themed one to go with all my esthetics. maybe like a car dashboard that i could drop and mustang logo with the red white and blue stripes behind it in the middle
Search the pages. I seen a few that might work
-
1 hour ago, mxrkis said:
Ummmm guys??
maybe I'm crazy but this has to be the worst way to share anything online in internet history.
This forum is windows95 caliber, cant decently host imaging to display peoples work, nor can it safely share files to get people started with decent templates.
I figured reddit would have better ideas as to where people go to share their stuff and sure enough there isn't even a subreddit for aida64 (#how)
... SO I MADE ONE.
Reddit still wont solve how to show and share quickly and safely so if anyone has ideas for that then we're all ears cuz this is a 250 page conversation long mess of broken links.
please feel free to head over there and start posting ideas on how we can get this a better forum as this one seems blatantly outdated and under appreciated by its host.
HELP!Ummmm mxrkis??
Thanks, but no thanks. Reddit is a great place, but I will stay here. I have no problem with this forum. Or the members of it. How is it not safe to share files here but it is at Reddit?
How about posting your ideas here as to how we can get this a better forum, rather than Reddit? That would make a little more sense wouldnt it?
And unless you can convince Elon Musk to give every member here $5000, how could it possibly be better?
-
4 hours ago, Guilherme Cirillo Cruz said:
That is gorgeous, any chance to be done in 1920x1080? can you share?
Yes please. In resolution posted or 1280X480. Also, am I able to edit the embossed labels to reflect my hardware? Or is that in the background design?
-
On 5/8/2022 at 11:13 PM, shoeprano27 said:
i have 2 monitors connected on my 2070 super. i was using a beadapanel lcd screen which didnt require a raspberry pi. it was as simple as micro usb to a usb 2.0. somehow, that shit got corrupted and i dont know how to get deep into the file system, shorten some circuits, using diskgenius reformat, blah blah. collecting dust in the garage. but now im using a regular 5in screen that require a pi. i connected the hdmi on the lcd to the hdmi on my motherboard and nothing was happening. totally forgot that my video card also have an hdmi port. connected the lcd hdmi to the video card hdmi and it added a 3rd screen in the display section with extended display. so i just dragged the aida64 panel through and off both monitors, depending where your lcd is placed and youll see it.
only problem i have is that i had to use a panda plug thats made for a pi with certain voltages, plugged into a wall outlet. if not, a fire icon is visible on the led screen and i dont have the time to come home from work with my house on fire. its probably a simple solution but id like to know what kind of cable yall is using to power it up, including a purchase link.
thanks in advance.
BeadaPanel Driver Install
Check out the post I made. Hope it helps you and others.
-
1
-
-
To those that have a USB connected BeadaPanel and want to use it as a Desktop Display, there is a driver for it now. Not sure if this applies to all the BeadaPanel USB Panel, but it works for the 6.8" 1280X480 panel.
Personally, I have to say the BeadaPanel 6.8" display is very nice. Clean, crisp, and bright. It is a little more expensive than other displays. But it 'works straight out of the box' using a USB connection, and enabling BeadaPanel in LCD settings. To further functionality, there is now a Windows Driver to enable it as a Desktop Display. If there is a downside to it, there are no built in mounting options, nor does it come with a case or enclosure. I had to fab my own mounts.
*****Please note: I am only a customer/user of BeadaPanel. If you find I have made a mistake, please let me know and I will correct it to ensure all info in this thread is correct. If I have missed something, let me know in a PM or reply, and I will add it. The original post will be updated continually.
- The Firmware upgrade (V7.01) allows the user to install a Windows Driver to enable the BeadaPanel to work as a Secondary Desktop Display.
- Prior to Firmware Upgrade or the Windows Driver install, shut down Aida64 and disable "Launch Aida64 at Startup". You can re-enable once completed.
I did the Firmware Flash and driver install. It was not all that painful as it looks. I had another member here private message me about how I went about it. To save some others a bit of grief, here is what I did and my observations. This is basically a copy and paste of my reply to that member.
The seller is the manufacturer or sole distributor as far as I can tell. I sent them an email and they replied with the instructions promptly. I will provide the links below.
I did the Firmware upgrade to V7.01. I followed the instructions given. The only thing that had me stumped was shorting J2-1 and J2-2. The instructions say to do it with the panel powered on. I did that but it did nothing until I unplugged it from the USB port and plugged it back in with it still shorted. Then it went into USB mode. I used a short piece of wire that just fit thru the 2 holes. J2-1 and J2-2 must remain shorted until Firmware flash is completed. I suggest powering BeadaPanel down before removing whatever you used to short J2-1 and J2-2.
The driver install was pretty straight forward. A bit of pissin around, but painless. Smoke a phatty first.
") For security, make sure you go back and enable Signed Drivers again when done. Unsigned drivers can contain malicious code. Even this was a bit sketchy in my books.
For security, make sure you go back and enable Signed Drivers again when done. Unsigned drivers can contain malicious code. Even this was a bit sketchy in my books.
I also saved the old Firmware ROM in the event I want to revert back to it.
- Once you go the Driver route, you use SensorPanel / OSD instead of LCD in Aida64. The scaling is off big time between SensorPanel / OSD and LCD, so any existing panels you had will have to be reconfigured. Or just make a new one.
- Enable SensorPanel
- Right Click the SensorPanel and select SensorPanel Manager to edit the panel. You can import custom panels or save your panel using the Import and Export buttons.
Also, once you install the driver, BeadaPanel wont be available to the LCD settings as it was. It is a full blown desktop display when using the driver. And you treat it as such in Aida64. Use SensorPanel / OSD.
BeadaPanel doesnt show up in NVIDIA Control Panel as a second display. But it does show in Windows 10 Display Settings. So use Windows to configure it, not the graphics driver. Not sure if this applies to AMD graphics cards as well.
****TIP: When designing/building your sensor panel, do it on your main display. If you don't, the SensorPanel Manager might become unusable because you cant see the title bar to move it or resize it. If this happens, click on the SensorPanel Manager to ensure it is in focus. Hit ALT+F4 on your keyboard and this will close the SensorPanel Manager window. Then slide the SensorPanel to your Main display and continue editing.
- Remove the taskbar from secondary display to free up more room for sensor panel goodies.
- Right click the taskbar, then click Taskbar Settings. You can do this on either screen.
- Scroll down to the Multiple Displays section. It's close to the bottom of the Taskbar settings, so keep scrolling.
- Turn “Show taskbar on all displays” off. You should see the change take effect immediately.
- The BeadaPanel will power off when PC shuts down with V7.01 Firmware
- There is no more Photo Frame Feature with V7.01 once you install the Driver.
- With only updating the Firmware, I believe you can still add your own pics and videos as before with the software tool. I havent tried this with V7.01, so I am not sure. I could add my own pics with the original Firmware. Use BeadaTools11.exe to do this if Driver not installed.
This is a copy and paste from the email sent to me.
"BeadaPanel has a new firmware v7.01 released now.
Please follow this link for upgrading-->
https://elinux.org/INNOSTICK6#Do_provision_on_a_Windows_Host
And this link for firmware images-->
https://1drv.ms/u/s!ArGfiTxjUGUlgP4toRQBQqoI0hVaBA?e=85Pu45
This link for user guide of new firmware -->
https://1drv.ms/u/s!ArGfiTxjUGUlgP4TpExX7fXmRr-QRg?e=HHKzwR
Regards
Weidong"
I hope that helps. To try and keep all info updated in one post, I will edit this thread as required. And my time permits. This should make info easier to find in one thread/post.
EDIT:
- You can update the firmware only, or install the Windows driver as well. But to install the Windows Driver, you must Upgrade the Firmware to v7.01 first.
- I flashed the firmware and installed the driver concurrently. With that said, I am not sure if it was the Firmware or Driver that enabled the BeadaPanel to power off at PC shut down. Maybe beada can confirm.
- As I said above, I saved the original Firmware ROM that shipped with my BeadaPanel. I did this so I could revert back for whatever reason. You may want to as well.
- You may need to rotate the display 180 degrees after driver install.
- Set Portrait or Landscape orientation in Windows Display Settings. Not with the Graphics Driver.
- When moving apps (Aida64 SensorPanel) from main display to the BeadaPanel, slide across the upper corners of Display 1.
- For photo frame feature, you can check in BeadaPanel FAT32 partition to see if there are 'console' and 'album' folders. If not, pull them from onedriver. Use BeadaTools11.exe to do this. Prior to launching BeadaTools11, shut down Aida64 or any other app using the BeadaPanel . The BeadaPanel will be displayed as a USB drive in Windows Explorer. To exit, either unplug the BeadaPanel and plug back in, or right click on it in Windows Explorer and select 'Unmount'.
- Custom made Sensor Panels can be found in this thread, Share your SensorPanel. These sensor panels have been created by members here at Aida64. There is a lot of work, skills, and creativity that goes into creating some of these panels. PLEASE USE THESE PANELS FOR PERSONAL USE ONLY UNLESS EXPRESS CONSENT GIVEN FROM AUTHOR/ARTIST. If modifying or using elements from different panels, PLEASE GIVE CREDIT TO ORIGINAL AUTHOR. IF PUBLISHING HERE OR IN ANOTHER FORUM OR WEBSITE, PLEASE GIVE CREDIT TO ORIGINAL AUTHOR.
-
3
-
On 5/3/2022 at 11:23 PM, xmanrigger said:
Wow, cool. That worked.
Thanks.
It did work. But unfortunately, I will have to revert back to old BIOS setting.
It does indeed power down now. But when I restart the PC from powered down state, the PC will start momentarily for a second and shut down, and then restart again to boot to Win10. Every time PC boots. It only does this before when I made certain changes in the BIOS. But only the for first boot after applying changes.
I dont think this is too good for my mechanical storage HD, or any other component for that matter.
What is really strange with the BIOS(V2403, Asus ROG Strix Z490-A), is that there is actually a setting to turn off power to USB at shut down. But it does nothing.


Share your Sensorpanels
in SensorPanel
Posted
So do you consider that sensor panel I posted lewd as well? Most though it was hilarious. So what gets censored next? You seem to be the only one with an issue. Is your issue the fact that a person doesnt have to guess the gender of the model? If so, there are tons of forums geared toward people leading 'alternate lifestyles'.